Shipping email notification
Steps to manage
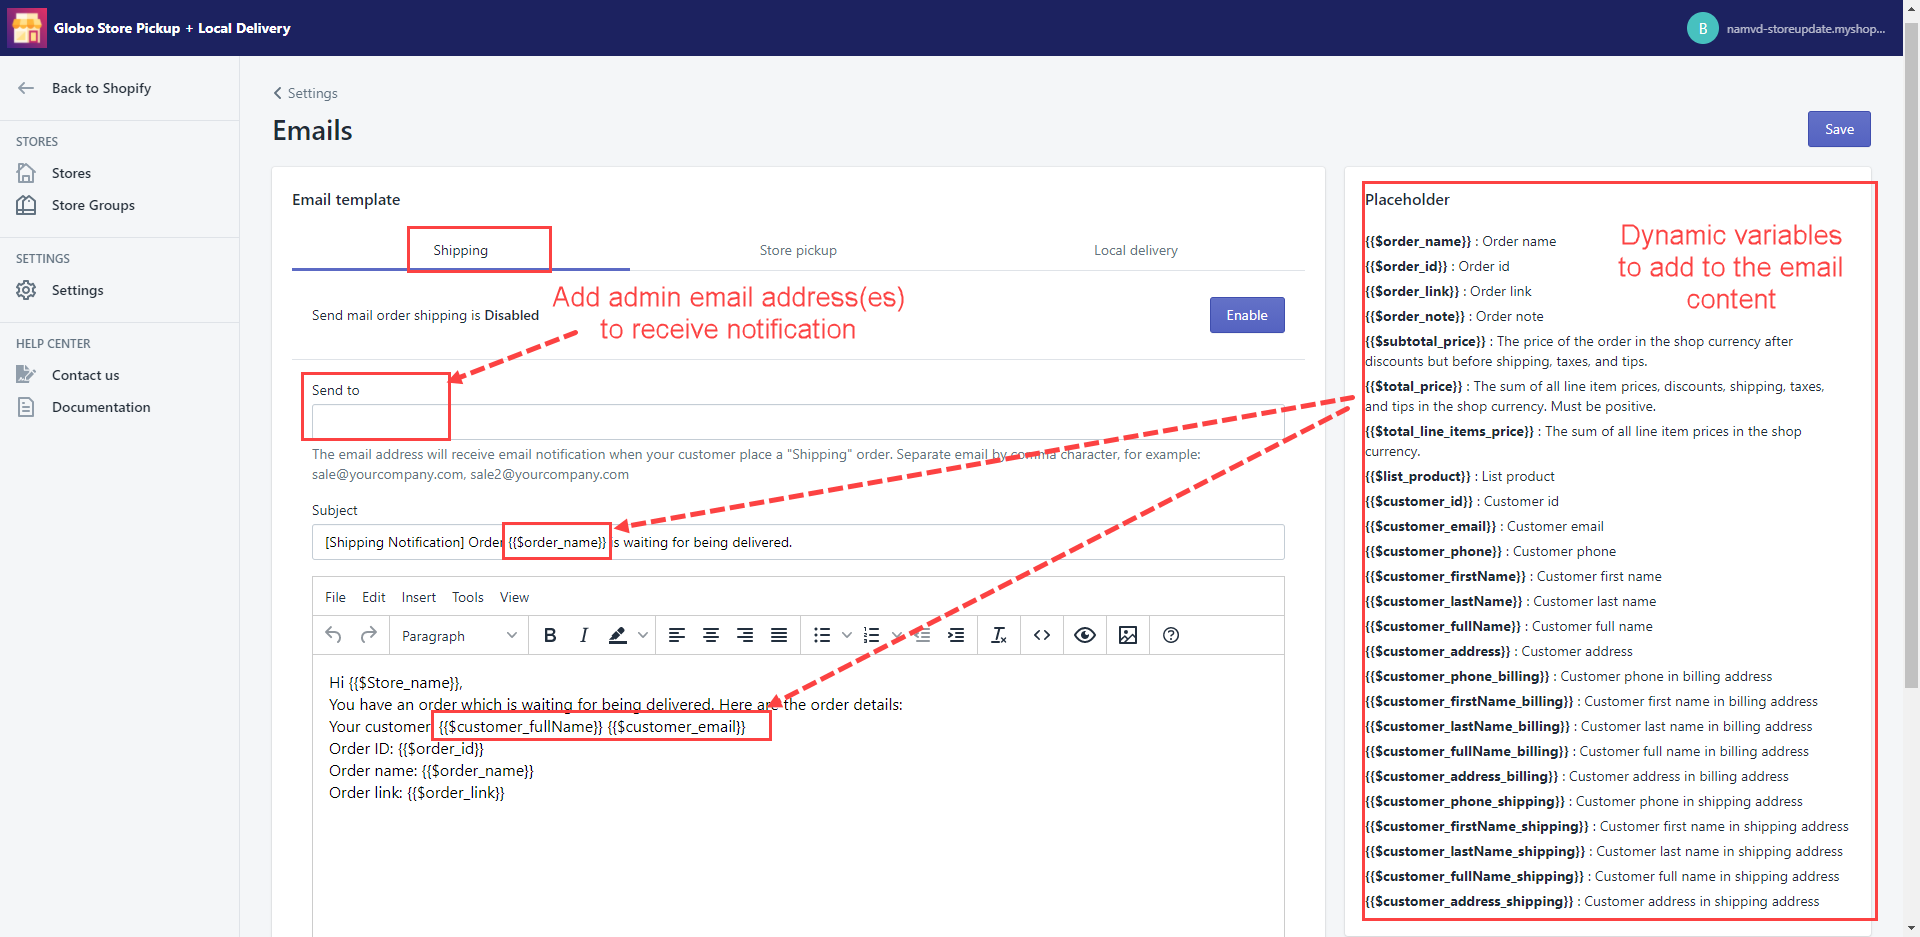
- From the app’s left sidebar, click Settings.
- In the Advanced section, select Email.
- Go to the Shipping tab.
- Click on the Enable button to turn on the Send mail order shipping function.
- Adjust the email template.
- In the Send to field, add the email address(es) to receive a notification. You can add multiple emails separated by a comma.
- In the Subject field, add the email subject.
- In the content box, add dynamic email content using the variable list on the right side.
- Click Save to finish.
Store pickup email notification
Steps to manage
- From the app’s left sidebar, click Settings.
- In the Advanced section, select Email.
- Go to the Store pickup tab.
- Click on the Enable button to turn on the Send mail order store pickup function.
- Adjust the email template.
- In the Send to field, add the email address(es) to receive a notification. You can add multiple emails separated by a comma.
- In the Subject field, add the email subject.
- In the content box, add dynamic email content using the variable list on the right side.
- Click Save to finish.
Note: Email notification will be sent to the email address(es) added in the Send to field as well as the email of the store that is picked up by your customers.
Local delivery email notification
Steps to manage
- From the app’s left sidebar, click Settings.
- In the Advanced section, select Email.
- Go to the Local Delivery tab.
- Click on the Enable button to turn on the Send mail order local delivery function.
- Adjust the email template.
- In the Send to field, add the email address(es) to receive a notification. You can add multiple emails separated by a comma.
- In the Subject field, add the email subject.
- In the content box, add dynamic email content using the variable list on the right side.
- Click Save to finish.