This function allows you to approve the customer account after the form is submitted.
We suggest using this option for the following use cases:
- Allowing new customers to register for an account and receive immediate access to their new account
- Allowing existing customers to edit their account details after logging in
Set up Require account approval
Steps to manage
1. Open the app > click Forms > open the form you want to edit
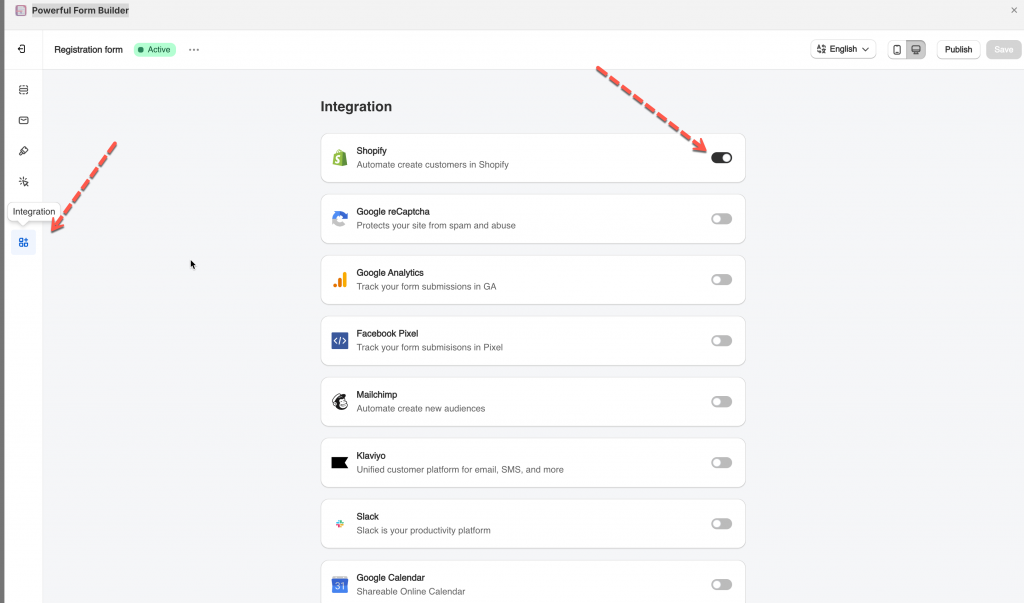
2. Click the Integration icon on the left side > enable Shopify
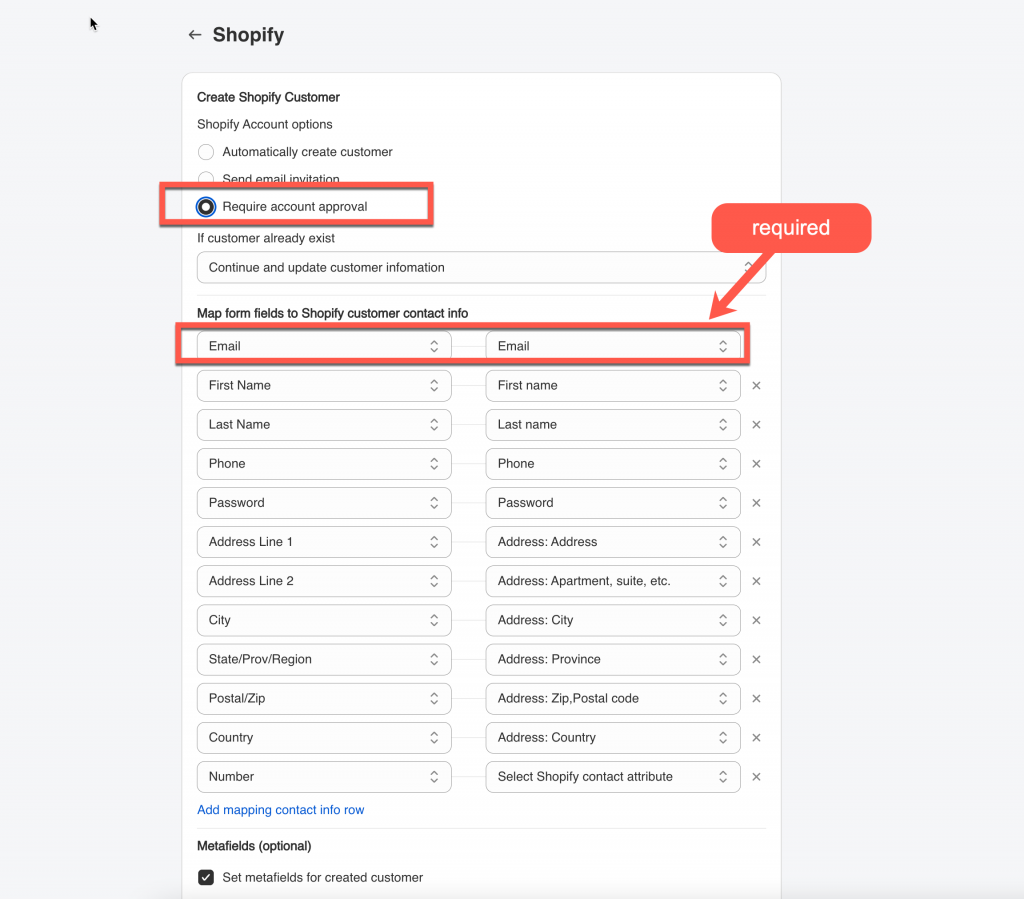
3. Select Shopify Account options > select Require account approval
4. Select the shopify attributes (on the right) to map with form fields (on the left). For example the Last name field of the form should be mapped with Shopify last name attribute,
Email field on the form is required to be mapped with email attribute of Shopify.
5. Add customer tag, note, metafield and select Marketing status of customer account (optional)
6. Save the form to apply the change
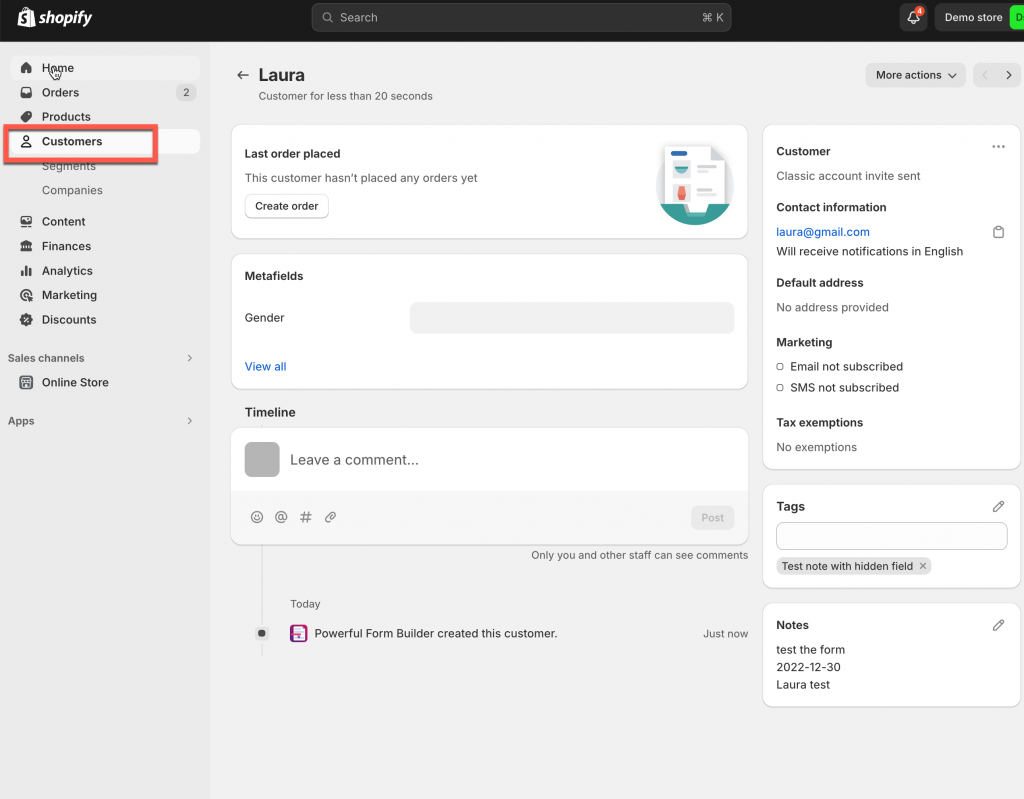
Submit the form and check the result
How to approve customer account?
Note: only Customer accounts created from the form can show up in Customers tab of the app. For Approved account, if you change/delete the account in the app> the change will be reflected to the Customers in Shopify.
Steps to manage
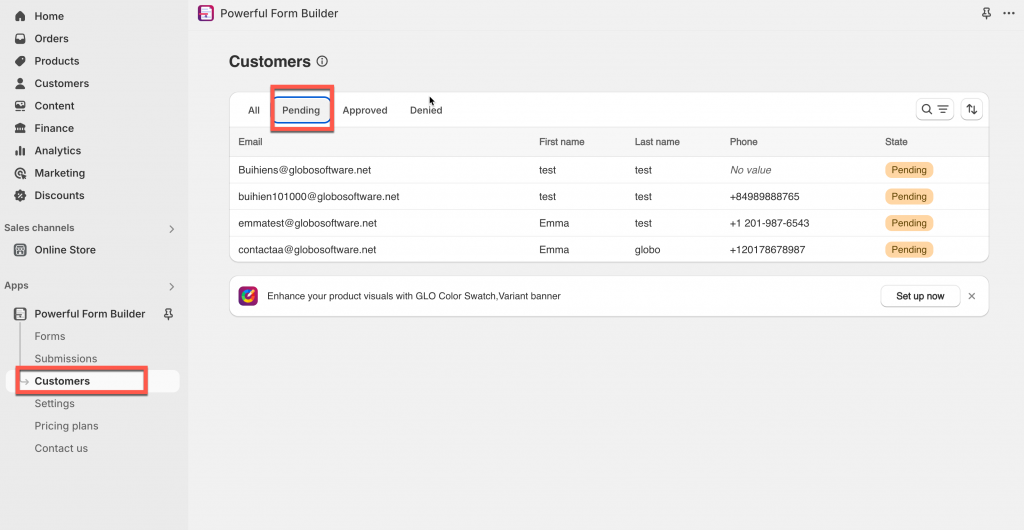
1. Open the app > click to Customers
2. Select Pending accounts on the Customers filter dropdown to view
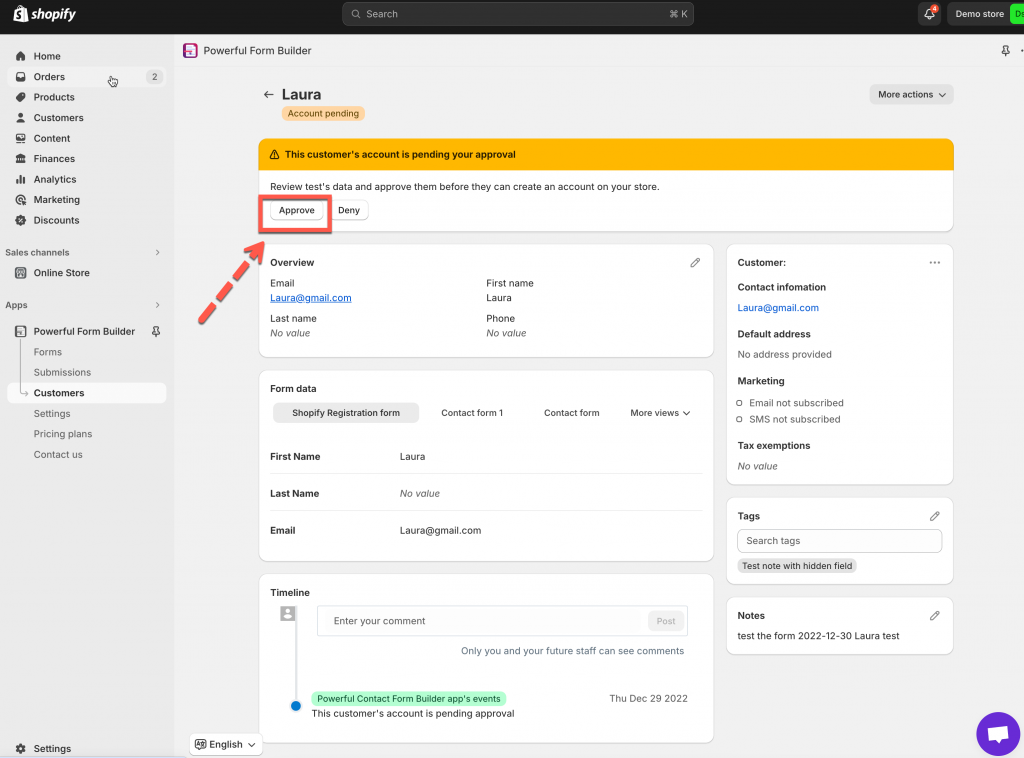
3. Click customer name to open customer detail > click Approve button
4. Confirm to approve and send an account invite to customer email on the popup. After that, there will be an account invite from Shopify sent to customer email
Customer account approval flow
If you enable the account option for ‘Require account approval‘, then each customer who submits the form will need to be manually approved before their account can be activated.
The customer account approval flow:
- Customer form submission
The customer fills out and submits your form on the storefront. This creates a pending customer record that only exists in the Globo Form Builder app. - The app triggers a confirmation email
After form submission, the app triggers its “Customer account request” email to be sent to the customer. This email lets the customer know that their form submission was received and is pending review. - Review the pending customer
Next, you can review the pending customer request in the app admin. Since the account has yet to be approved, it only exists in the app and will not be available in Shopify. - Approve or deny the customer
When you open a pending request, you will have the option to either Approve or Deny the customer account.
- If you approve a pending customer, the app’s “Customer account approval” email is automatically sent to the customer. This email uses Shopify’s account invite email template, which contains a special link for the customer to set a password and activate their account.
- If you deny a pending customer, the app’s “Customer account deny” email will be sent to the customer, and they will not be granted an account. (You will still have the option to approve a denied customer if you change your mind later on.)
5. Customer activates account
Once the customer receives the account activation email, they will be able to set a password for their account and activate their account successfully.
If you do encounter any difficulty while proceeding these steps, don’t show any hesitation to contact us promptly via the email address [email protected]
We are always willing to help with all sincerity!

