The importing/exporting option sets functions are extremely helpful for Shopify multi-stores. It helps you to save a ton of time by re-using option sets for your different stores.
CSV files
CSV stands for comma-separated values, a file format (.csv) for spreadsheets. You can use CSV files to import and export products, customers, inventory, orders (export only), and discounts (export only).
They can be useful in many situations, such as when you are switching to Shopify from another ecommerce platform, need to import a list of customer accounts, or want to upload products by using a spreadsheet.
CSV files might seem intimidating at first, but after you understand their format and how they work, you might decide to use them for a variety of tasks.
Your CSV files must use UTF-8 encoding.
Download a sample CSV file
Download a sample CSV template to see an example of the format required.
Description of the option set CSV file
| Column | Default value created when the column is blank |
| option_id |
Id are unique names for each option. They can contain letters, dashes, and numbers, but no spaces, accents, or other characters, including periods. For example: text-1, number-1. Every line in the CSV file that starts with a different id is treated as a new option. To add multiple option_value to an option, you must add multiple lines with the same id. |
| option_type |
A label that describes the type of option. For example: • text : Text (short text) • textarea :Textarea (long text) • number : Number : • datetime : Datetime • file : File Upload • select : Select (dropdown) • radio : Radio Button • checkbox : Checkbox • button : Button • color-swatches : Color Swatch • image-swatches : Image Swatch • paragraph : Paragraph |
| option_label | The label of an option. This text will be displayed above the option field on the product details page |
| option_name | The name of an option. This text represents the name of the option element and will be displayed at: cart page, checkout, order details page,… |
| required |
Specifies that the option field must be filled out before submitting the product form. Valid values are Yes or No or blank. |
| min | • Minimum value for Number.
• Minimum selections for Checkbox, Button, Color Swatch, Image Swatch. Only include numbers. For example, 10. |
| max |
• Maximum number of characters allowed for Text, Textarea • Maximum value for Number • Maximum selections for Checkbox, Button, Color Swatch, Image Swatch |
| placeholder | |
| helptext | |
| option_value | Option value of option |
| addon | The add-on price of the option. Only include the price and don’t include any currency symbols. For example: 100 |
| swatch_value |
• Color hex code for Color Swatch. For example: #FF0000 • Image src url for Image Swatch. For example: https://option.nyc3.digitaloceanspaces.com/files/1/image-swatches-1_5_1651226253758-1651226259.jpg |
| paragraph | Contents of Paragraph |
| products |
• Manual: List of product ids separated by comma. For example: 1858259189806,1858179825710 • All: All products. For example: all |
Export option sets
Steps to manage
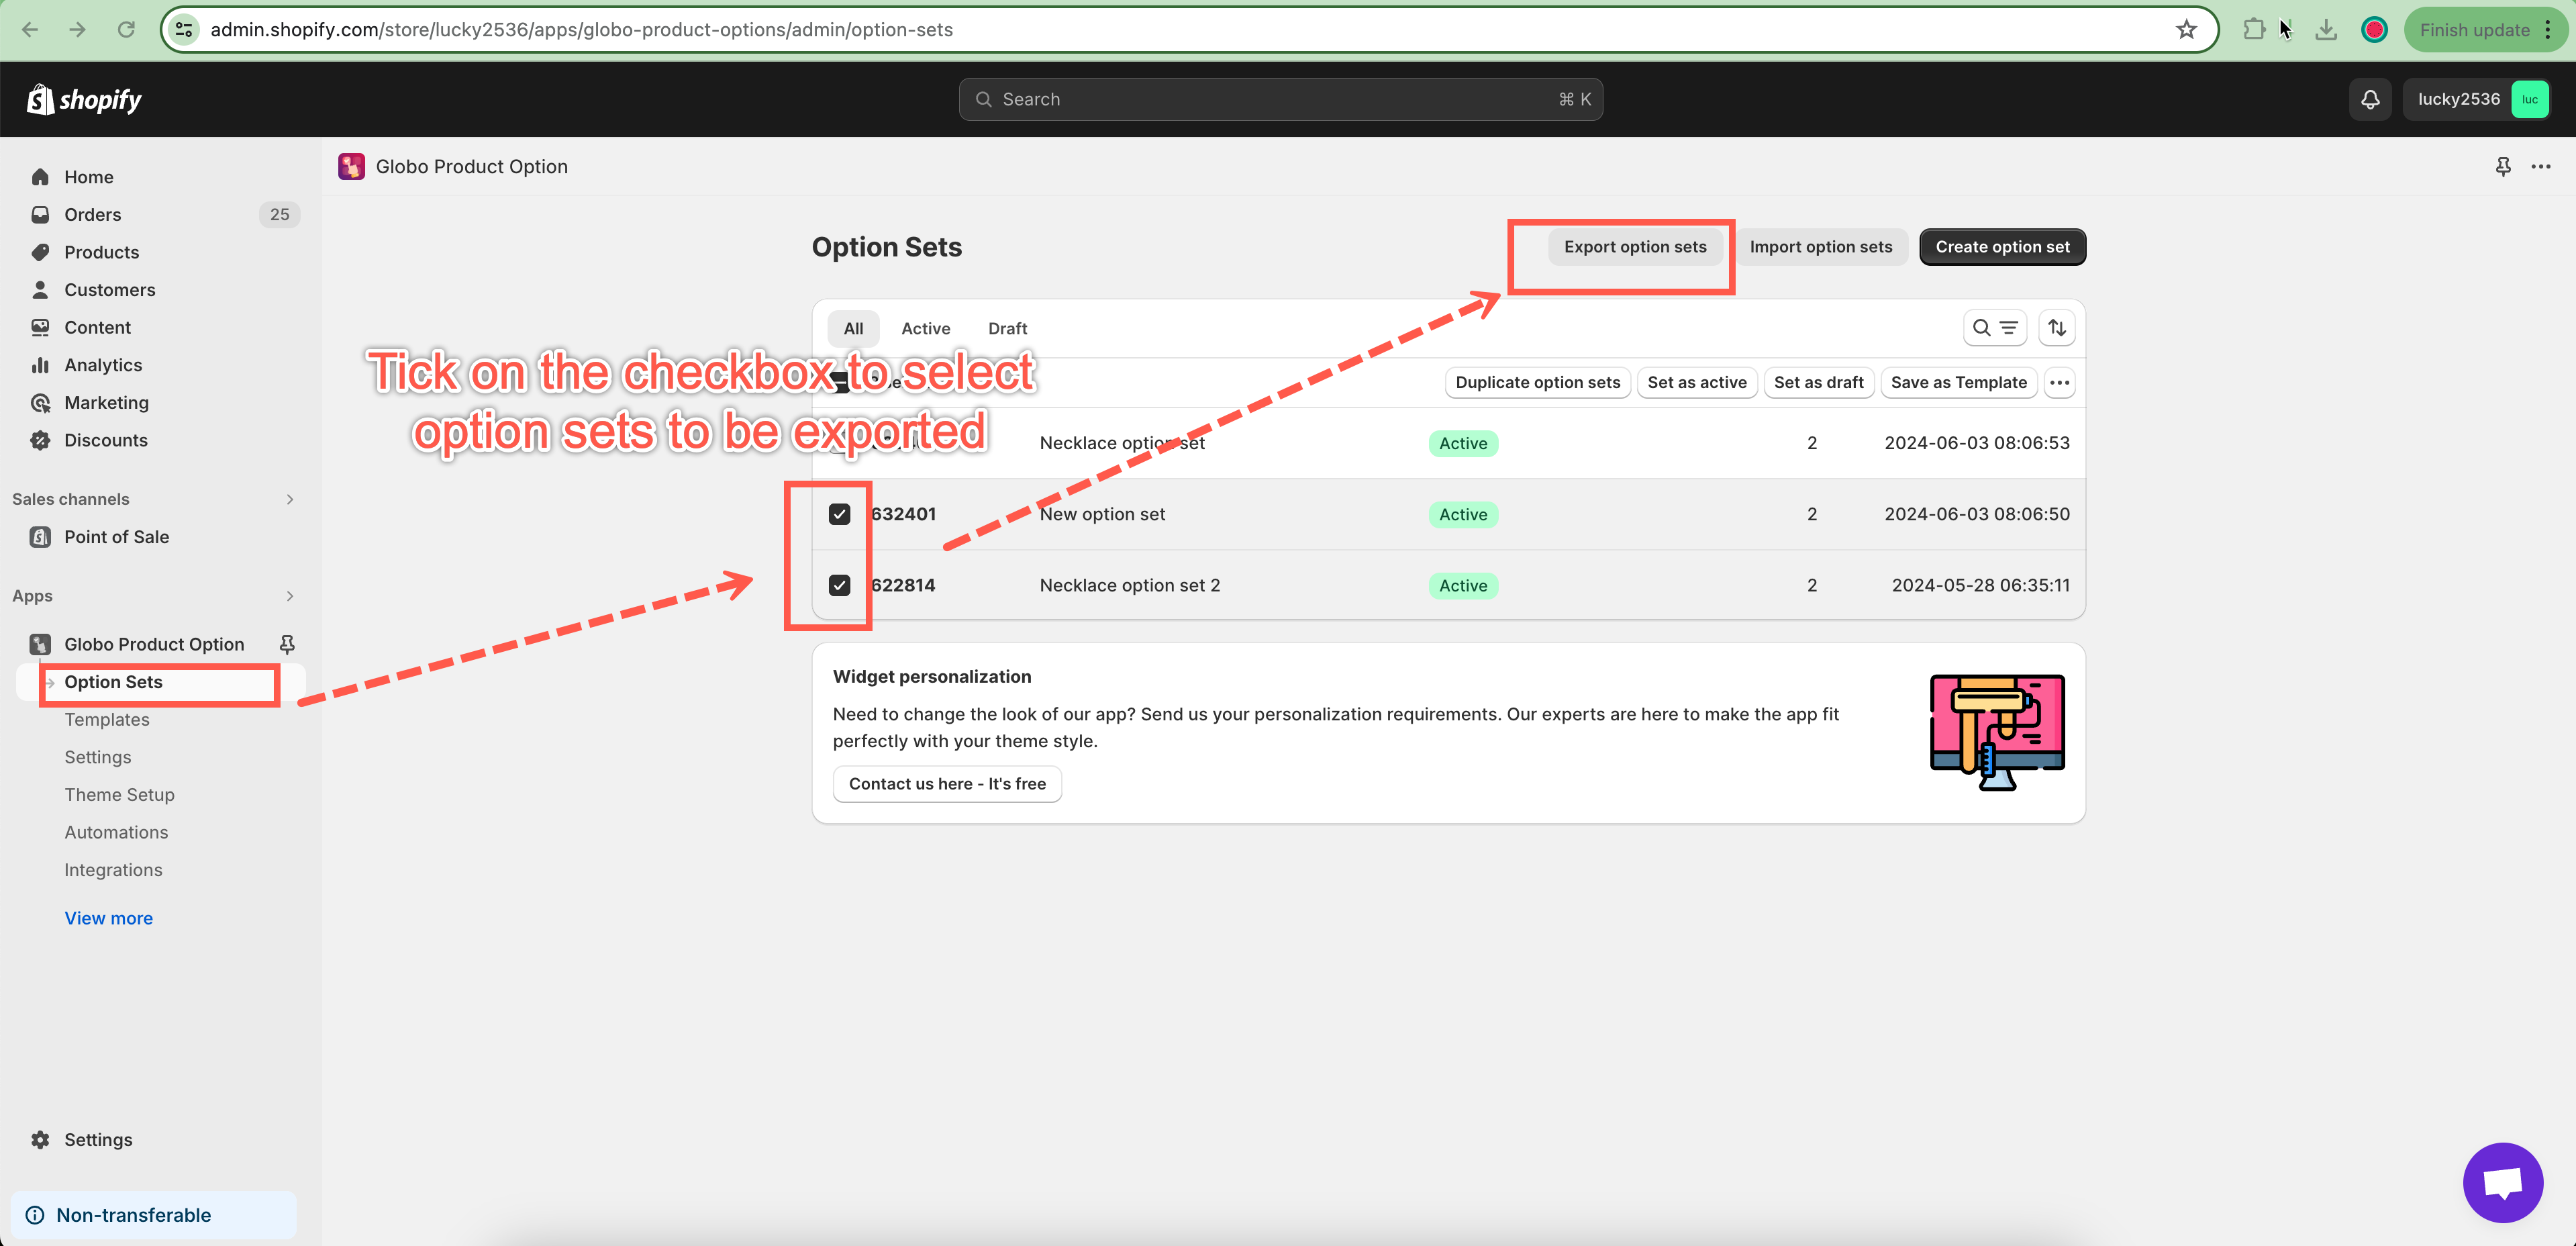
- From the app’s left navigation, click Option sets.
- In the list of option sets, you choose the option sets you want to export.
- Click the Export Option sets button.
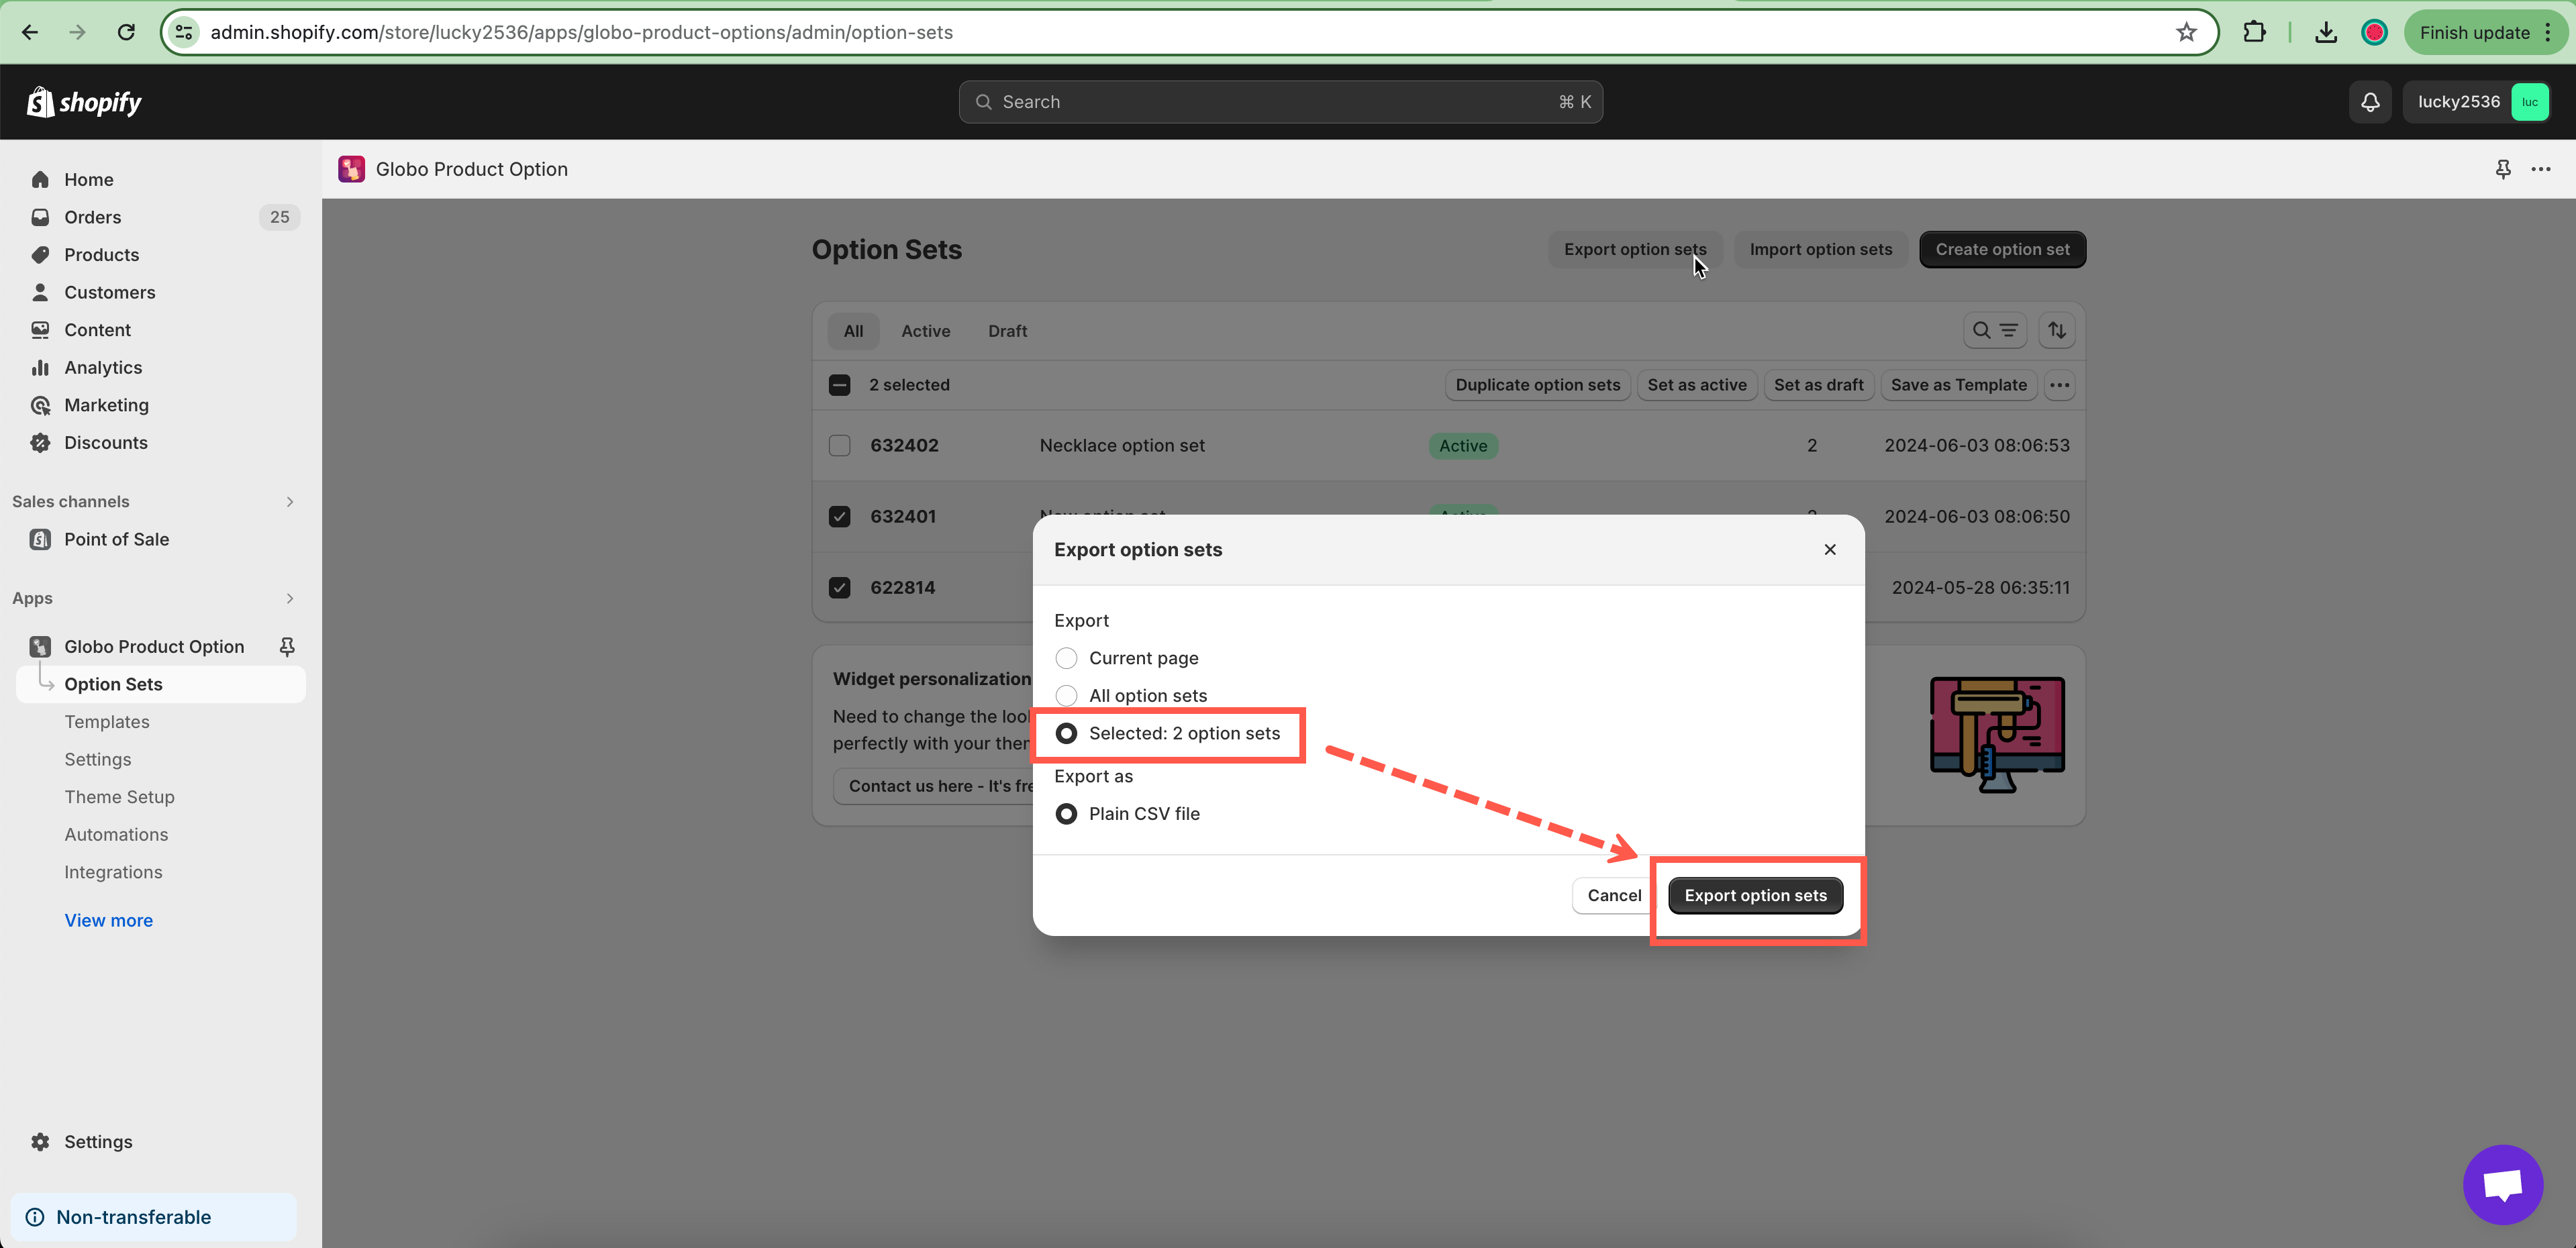
- In the new popup window, click the Export option sets button.
- The app will automatically generate a CSV file.
- You should save this file on your computer for future use.
Import option sets
Steps to manage
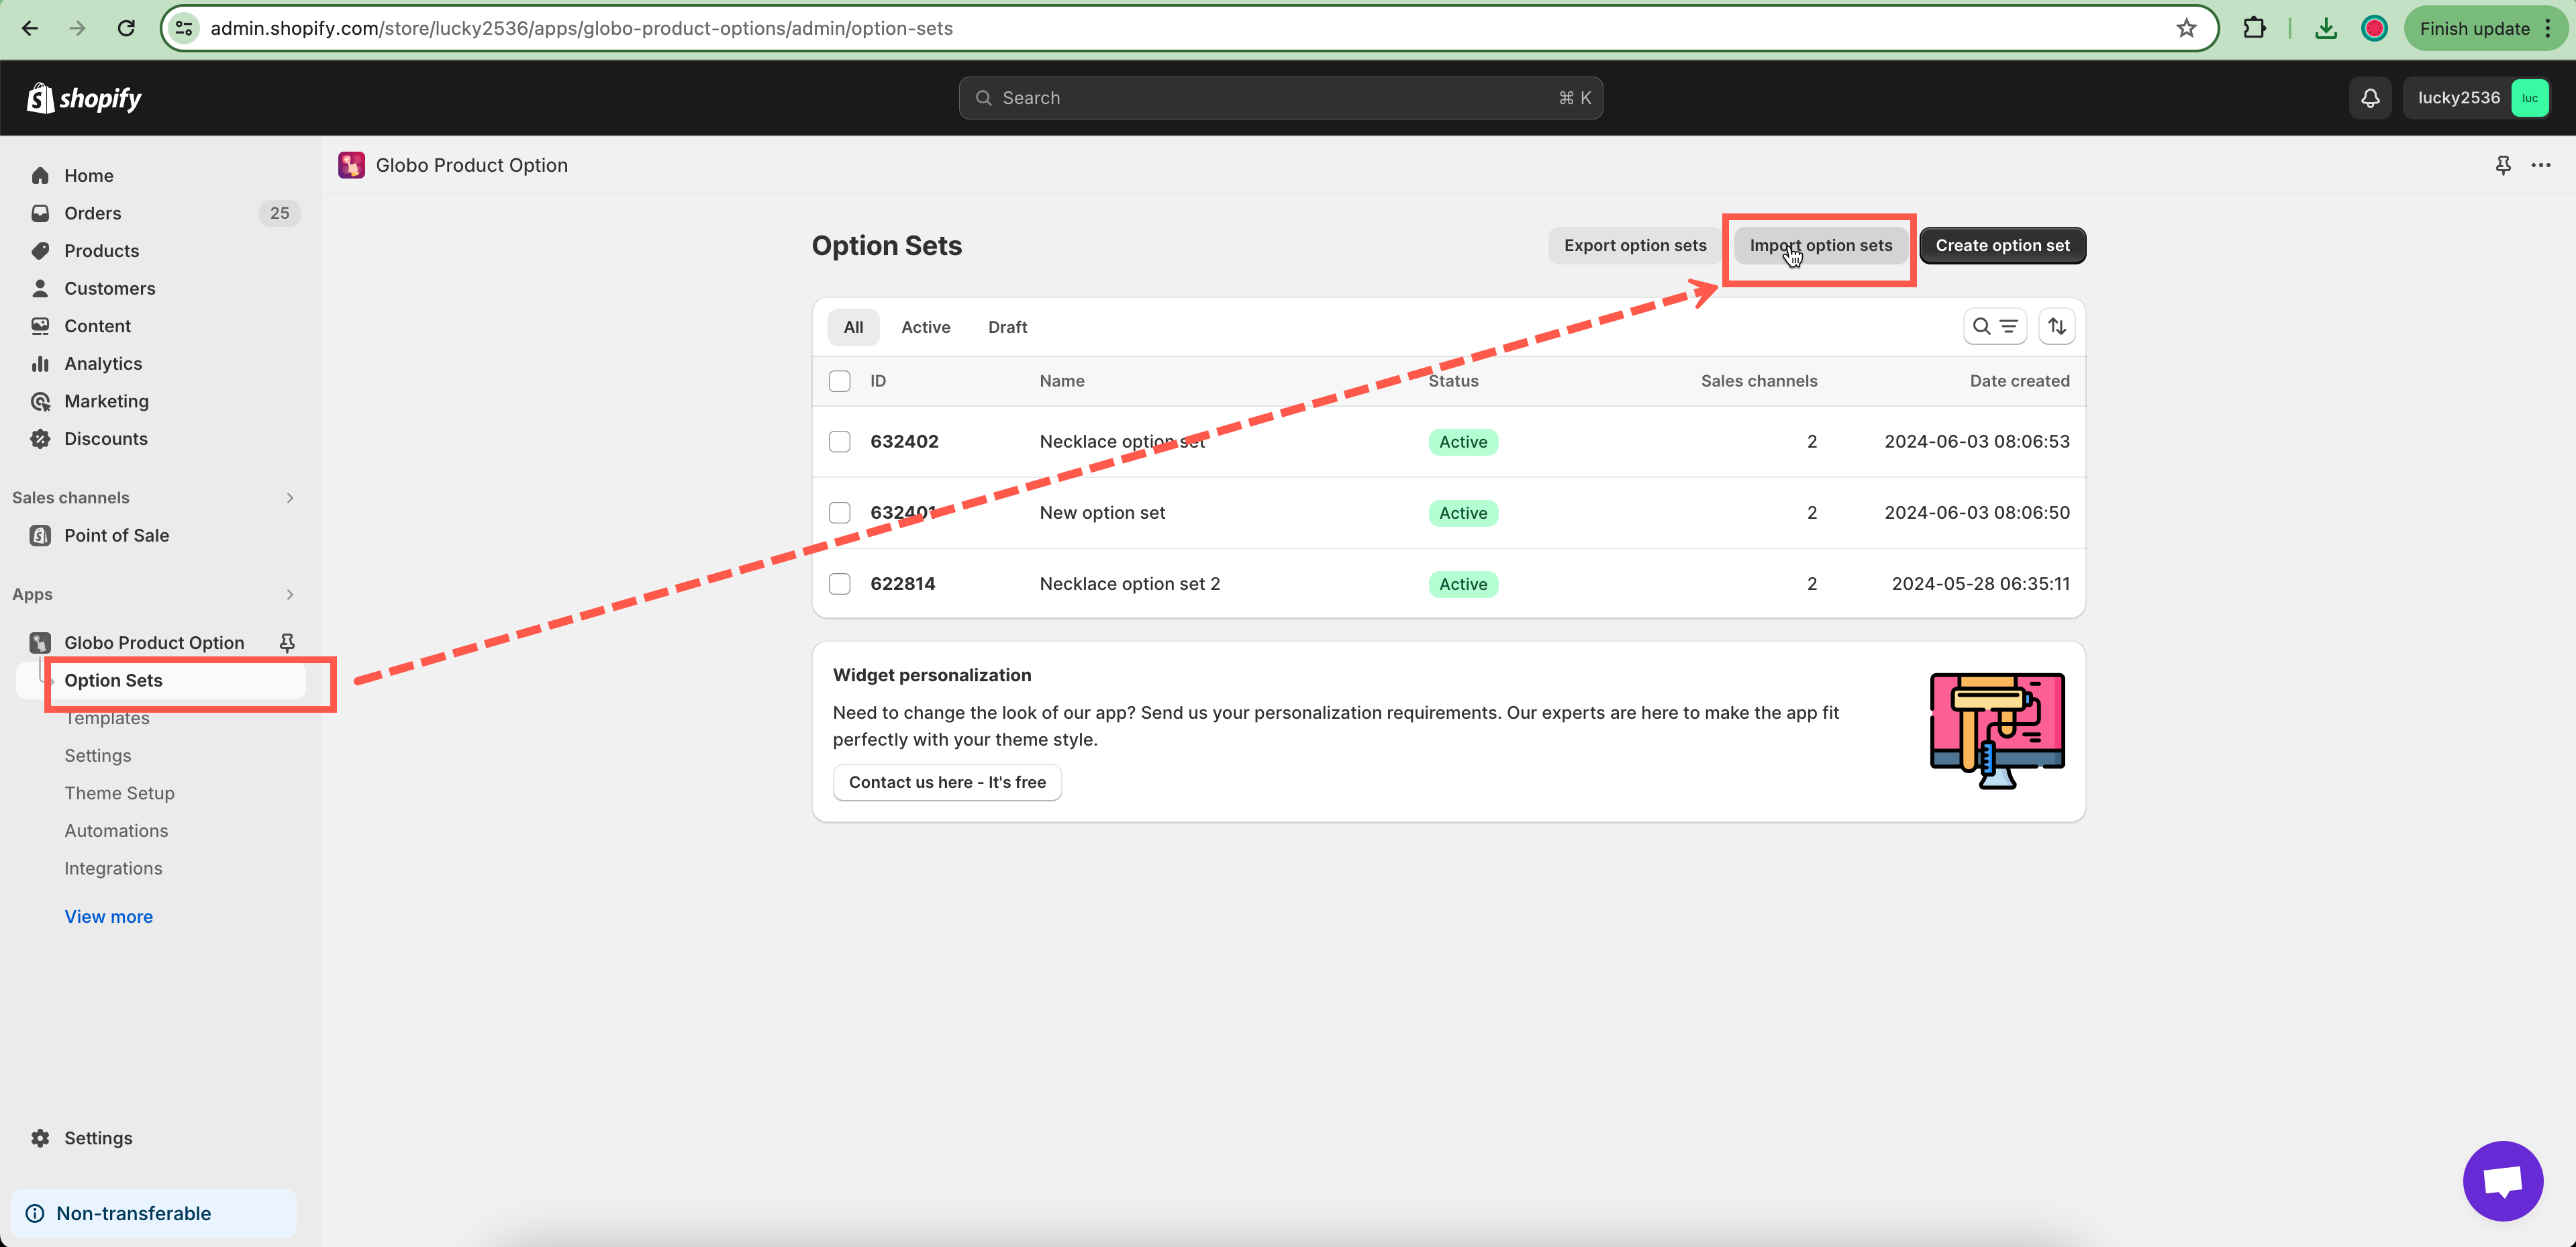
- From the app’s left navigation, click Option sets.
- Click the Import Option sets button.
- In the new popup window, click the Add file button.
- Select a CSV file you’ve created by using the above structure or the file you received when exporting the option sets.
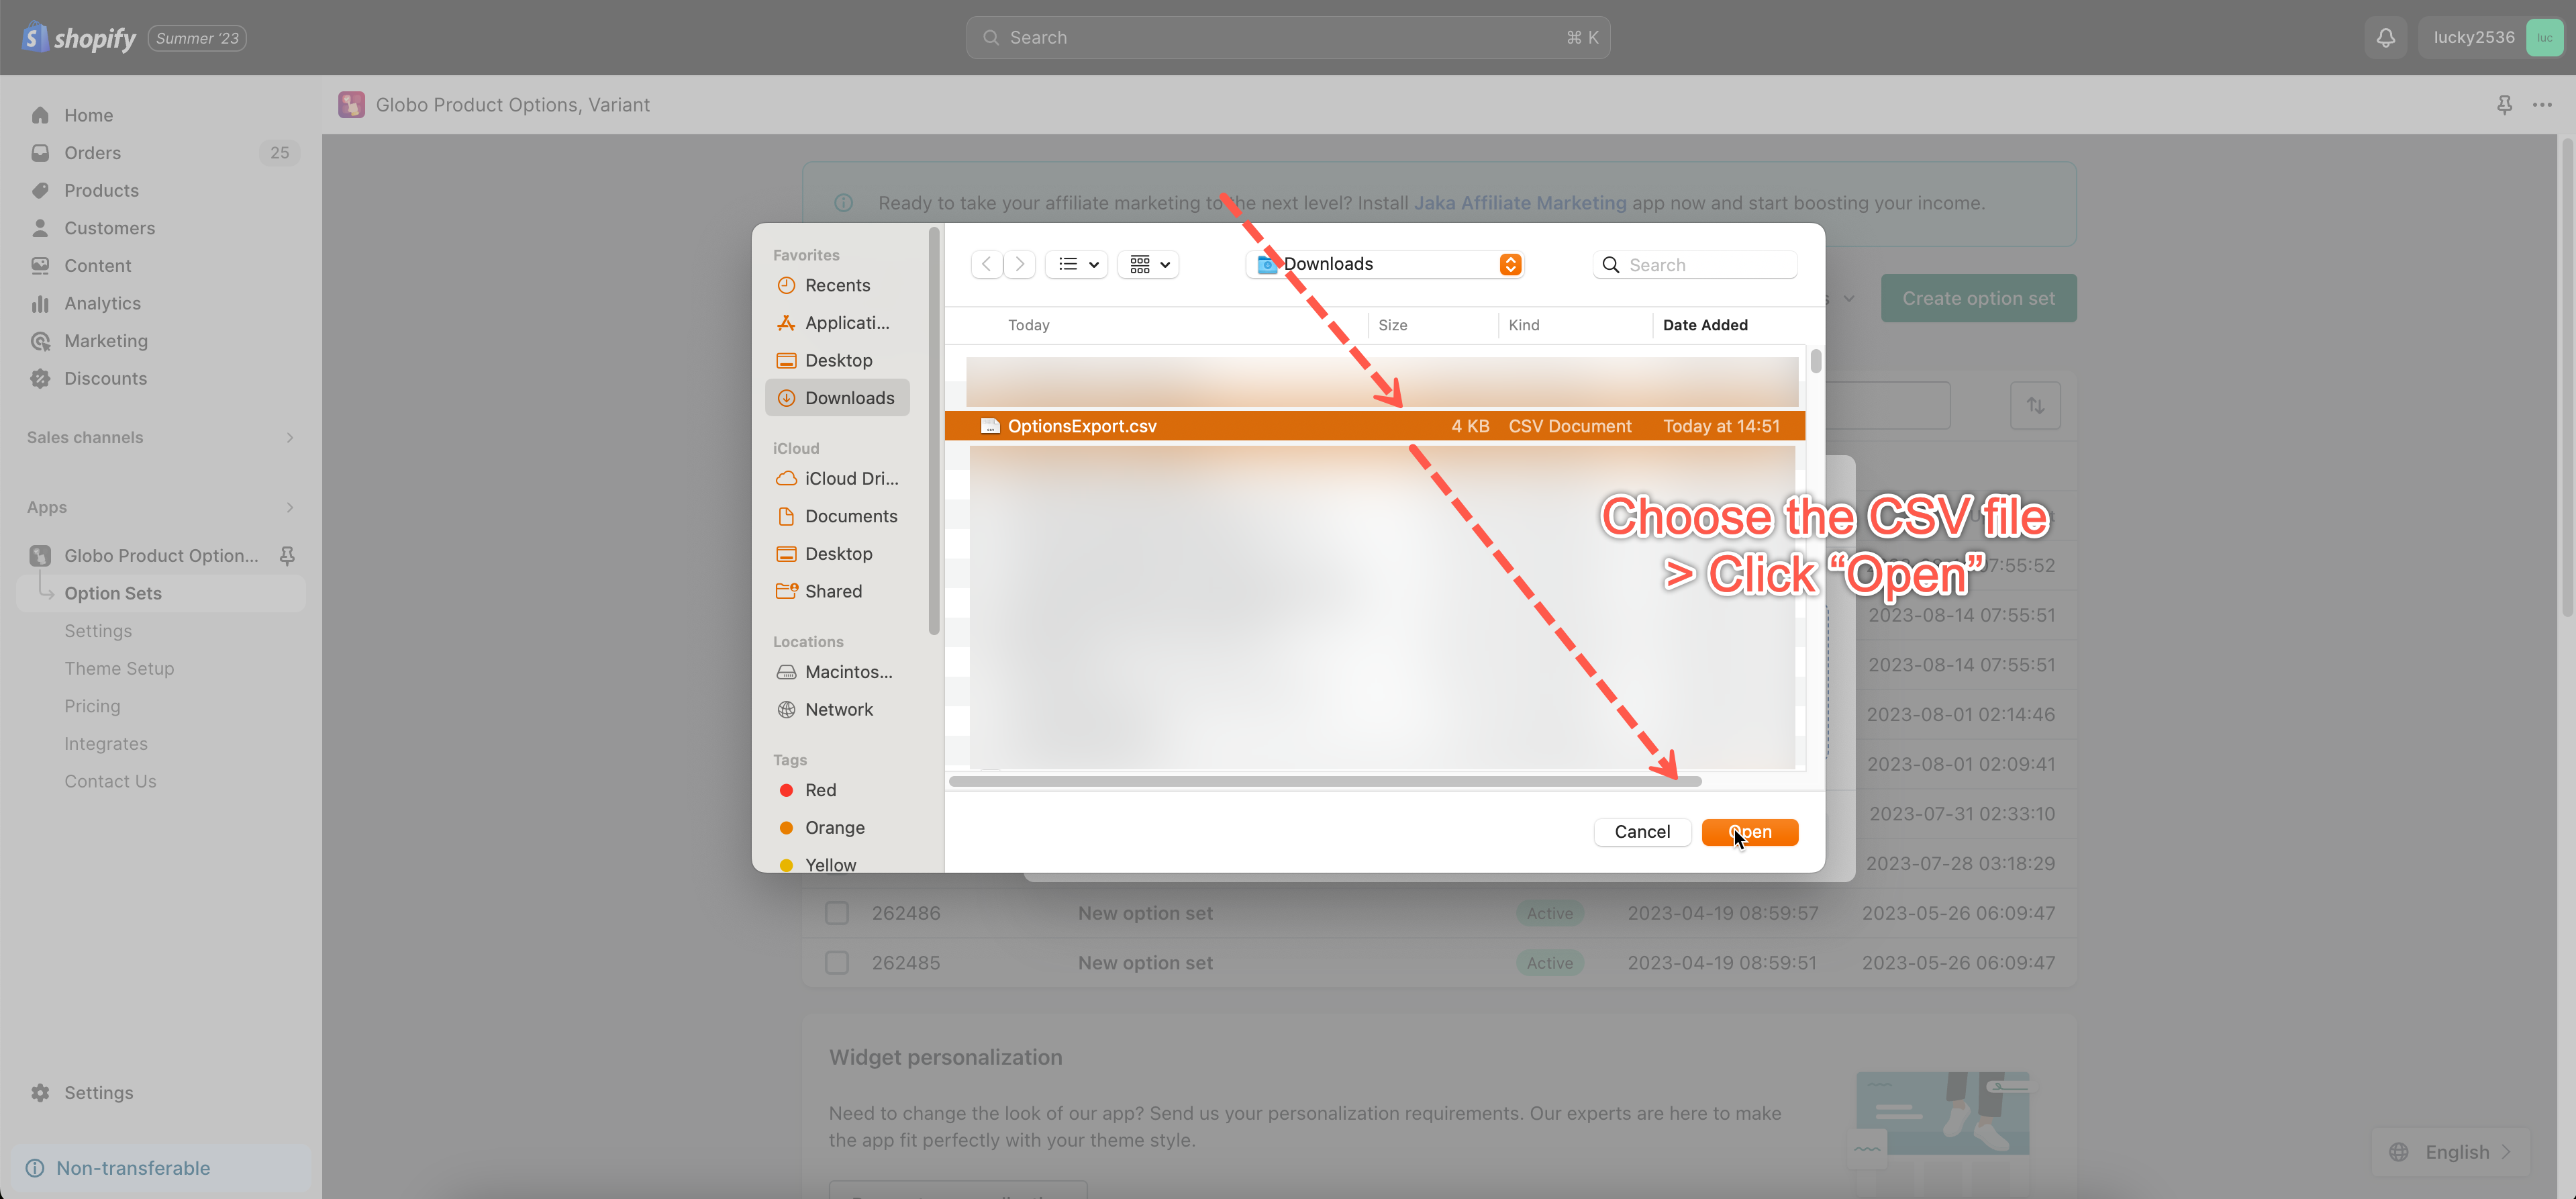
- Click the Upload and Continue button.
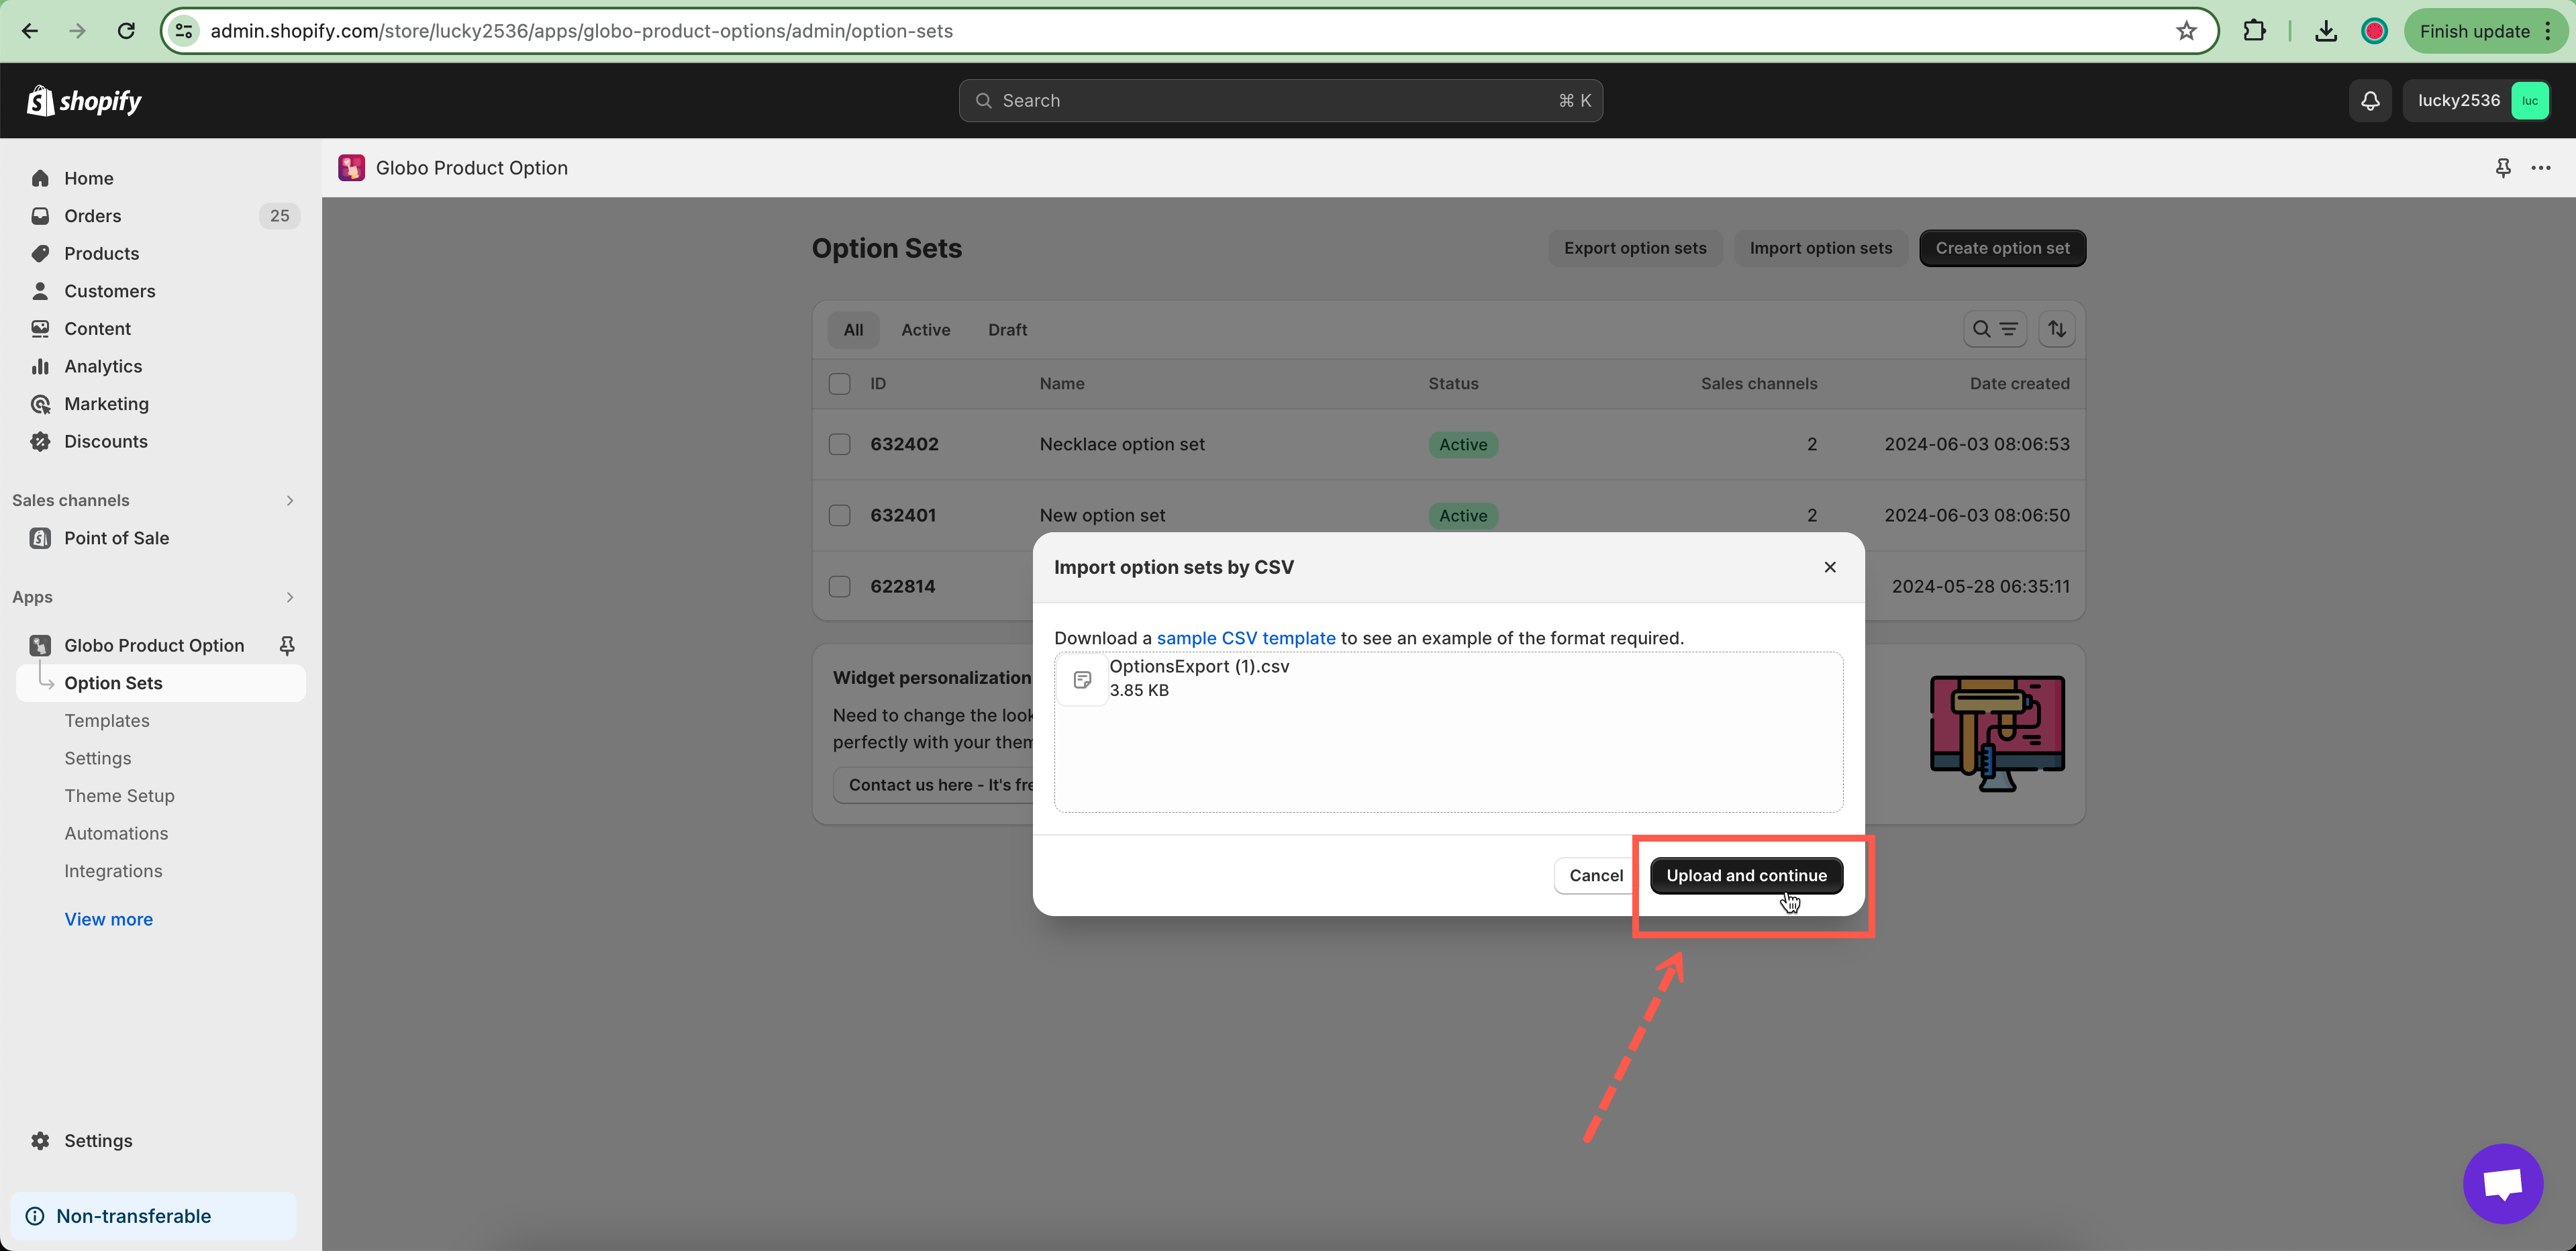
- Wait for a few moments. The list of option sets will appear after that.
If you do encounter any difficulty while proceeding with these steps, don’t show any hesitation to contact us promptly via the email address [email protected]
We are always willing to help with all sincerity!

