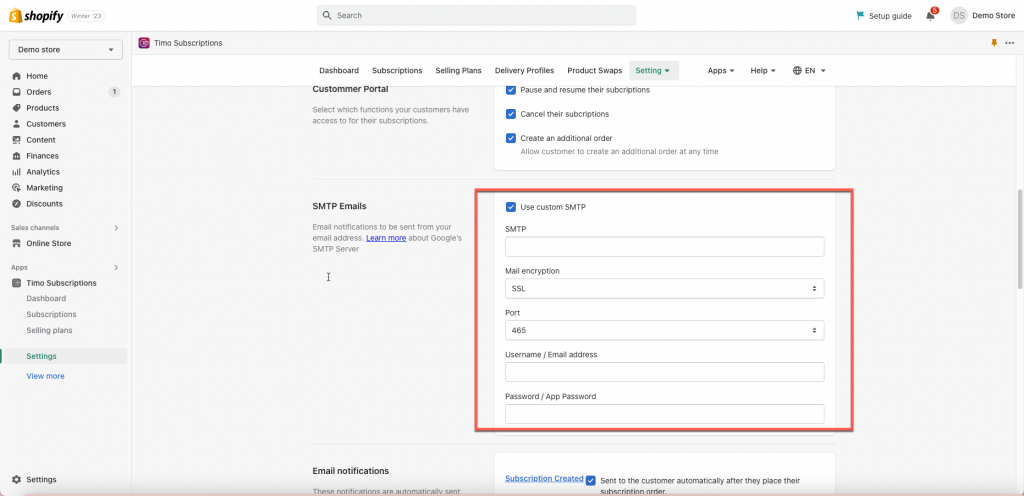
- This is an optional setting. If you set up SMTP, the email notification will be sent from your own email address.
- If you do not configure this option, email notifications will be sent from our email server ([email protected]) by default
In the app Timo Subscription:
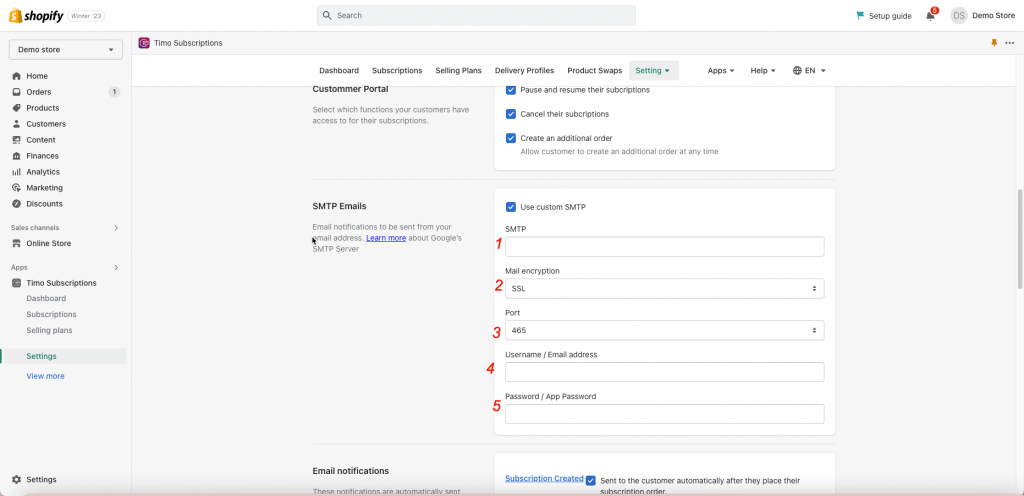
- From app admin page, click Setting > SMTP Emails
- Tick on the checkbox
- Enter your account information
- Click Save
Below is the step to set up Google SMTP for your reference.
Configure SMTP account:
Step 1: Allow Access to Google Accoun
Before using Gmail SMTP, you need to authorize your server to access your Google account.
Click here > log into your Gmail account > click Continue button. This will enable your account to access your new device (webserver).
Note:
- You should use your main Google account to achieve this purpose
- If you have merged accounts from google you will receive an authentication error
Step 2: Generate App Password if 2-Step Verification is Enabled
- Please make sure 2-Step Verification is enabled in your Google account. Learn more
- Then click here to generate App password
- Select Other/Custom name from Select App, give it a name such as “DO – Production Server” and then click Generate
- Note down the application password as it will be required in the next step
Step 3: Configure Gmail on the SMTP Add-on
Enter the Gmail details inside SMTP app (to activate SMTP app).
- Enable “Use custom SMTP”
- Enter smtp.gmail.com as your host
- Use port 465
- Enter your Gmail login username [email protected]
- Enter your App password
Note:
App password in step 5 is the app password generated in Step #2 above. It’s NOT your Gmail account password.
If you have any questions or concerns, don’t hesitate to contact us at [email protected]. We are always willing to help with all sincerity.


