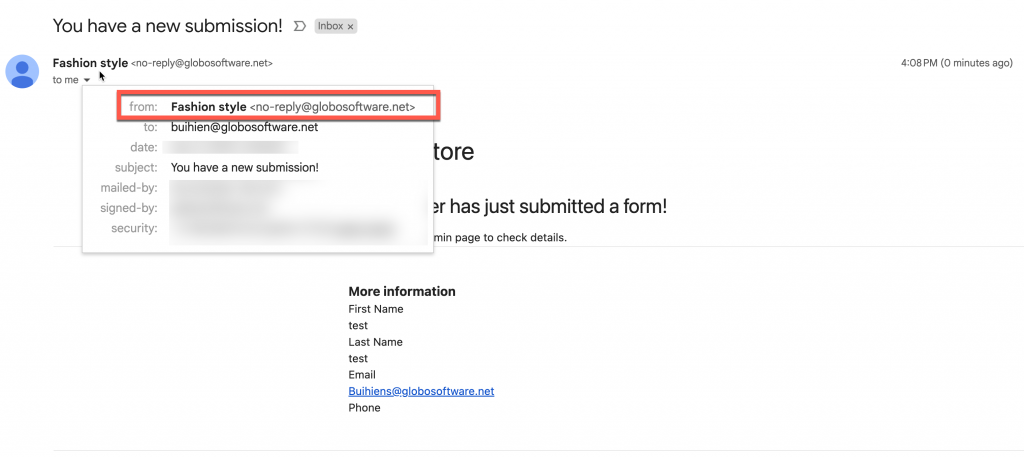
- Email notifications will be sent from our email server [email protected] by default to your admin emails and customer emails. If you set up SMTP, the email notification will be sent from your own email address. (optional)
The sender will be your SMTP email address, not [email protected].
General steps
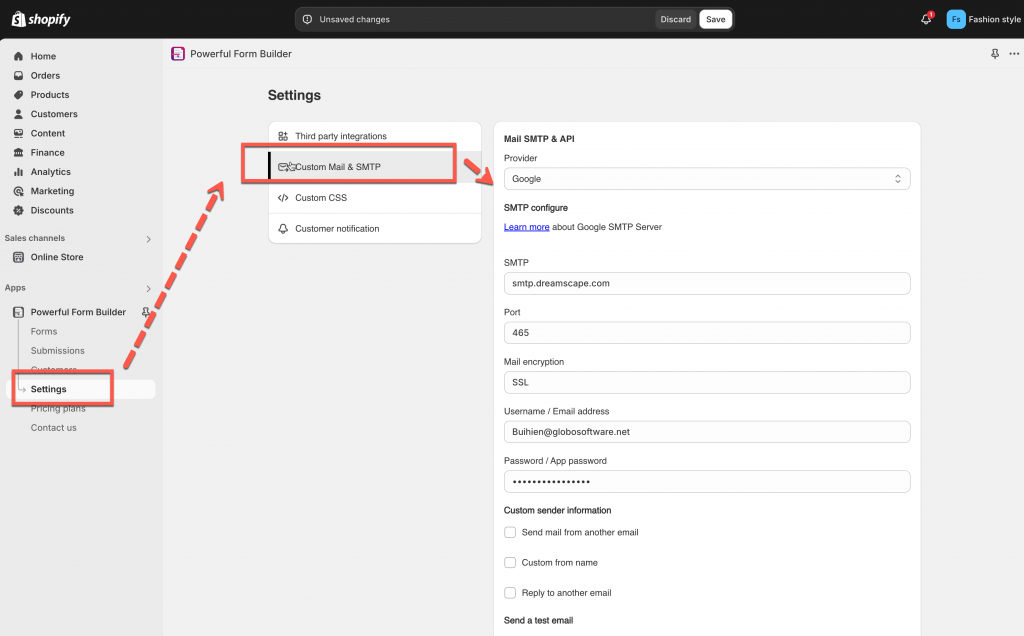
1. Open the app > click Settings >click Custom Mail & SMTP > select one of the provider in Provider dropdown
Note:
It is not required to set up SMTP with Google and Outlook. If you want to set SMTP with Mailjet for example, please select google as alternative, please select Google as provider (ignore the provider) and add Mailjet host, email, password, port, …
2. Enter the data of SMTP config: SMTP Host, user name/email, password, port, Encryption
3. Click Save to update the settings, then send a test email to check if it works for you
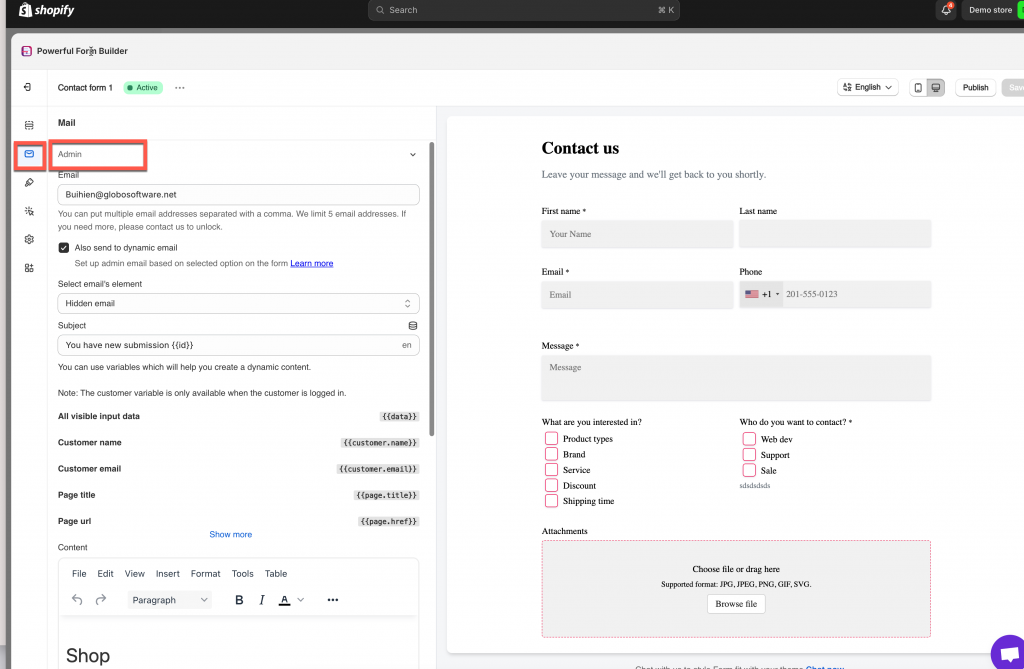
4. Go to the Forms tab of the app, open the form you want
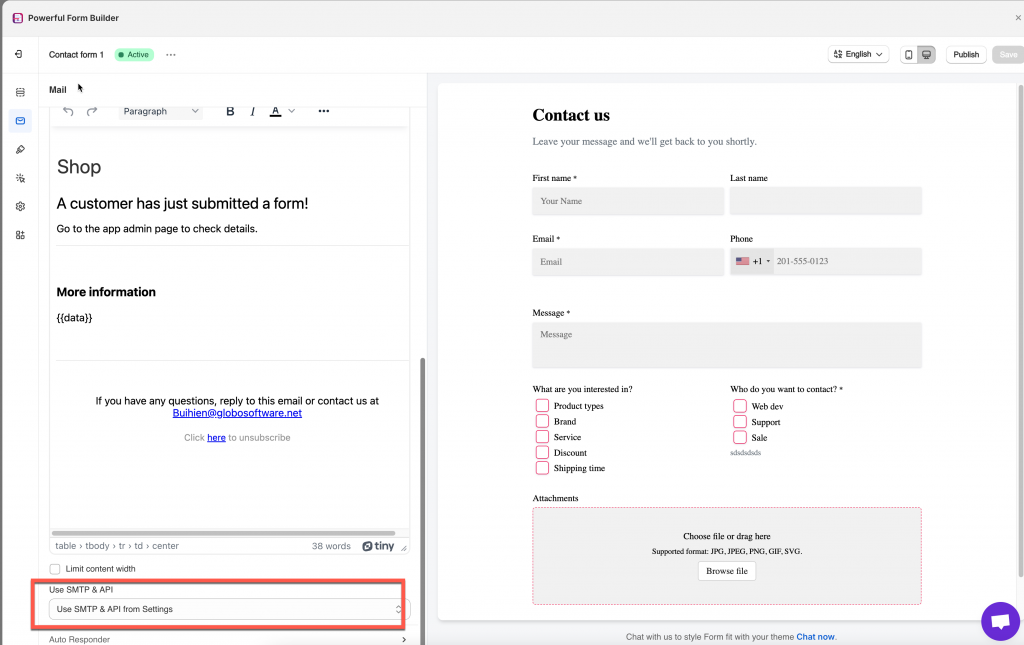
5. In the form config, click Mail icon on the left side> click Admin > scroll down to Use SMTP & API > select Use SMTP & API from Settings
7. Click Save
Note:
- Remember to Save the configuration before sending test email
Google SMTP
- Select Google as provider in Provider dropdown
- SMTP (host): smtp.gmail.com
- Port: 465
- User name/Email address: your Gmail address, for example [email protected]
- App password: not your email password, app password contains 16 characters without blank space. Know more how to create app password
- Send email from another email address (optional). Learn more
Outlook SMTP
You can view Google SMTP for reference. Below are some credentials for Outlook SMTP.
Provider: Outlook
SMTP (host): smtp-mail.outlook.com
Port: 587
If you do encounter any difficulty while proceeding these steps, don’t show any hesitation to contact us promptly via the email address [email protected]
We are always willing to help with all sincerity!


