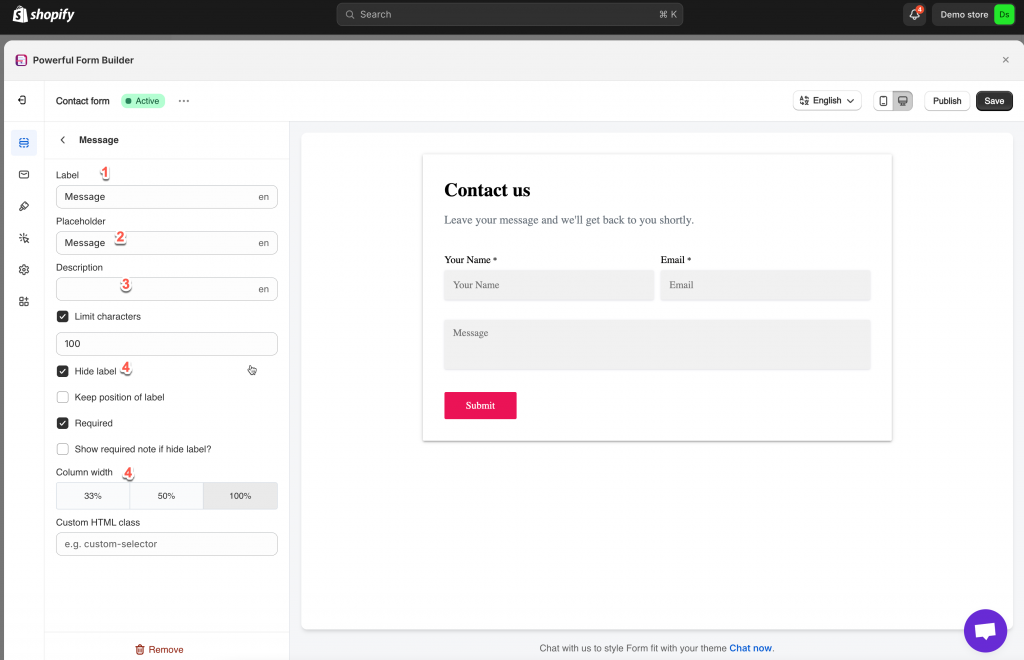
Please follow our steps below to create a new form
Step 1: Add a new form
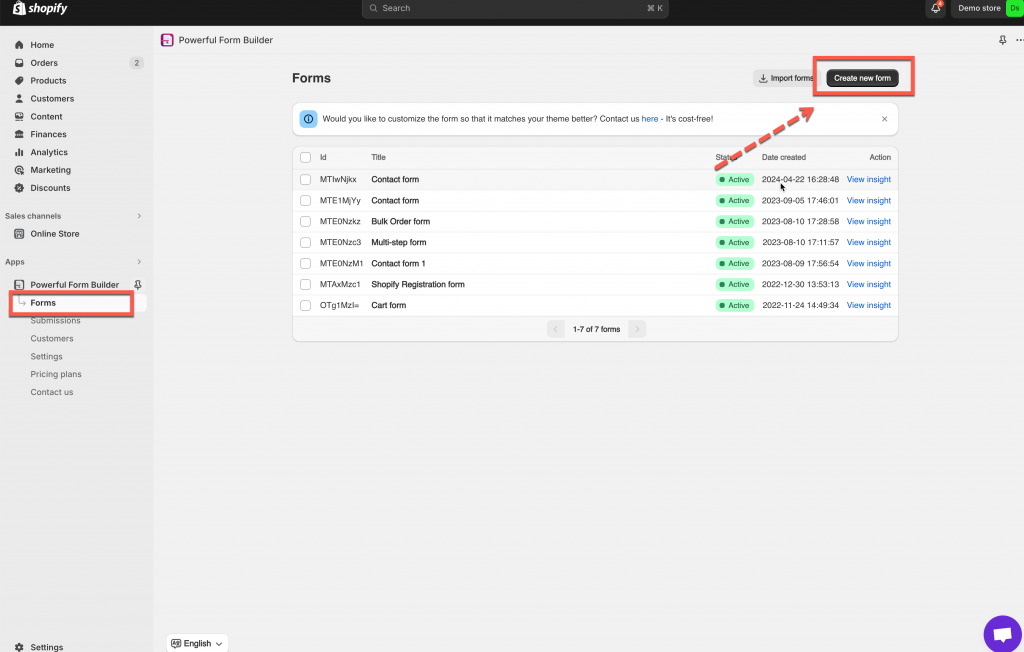
- From app admin page > click Forms > click Create new form button
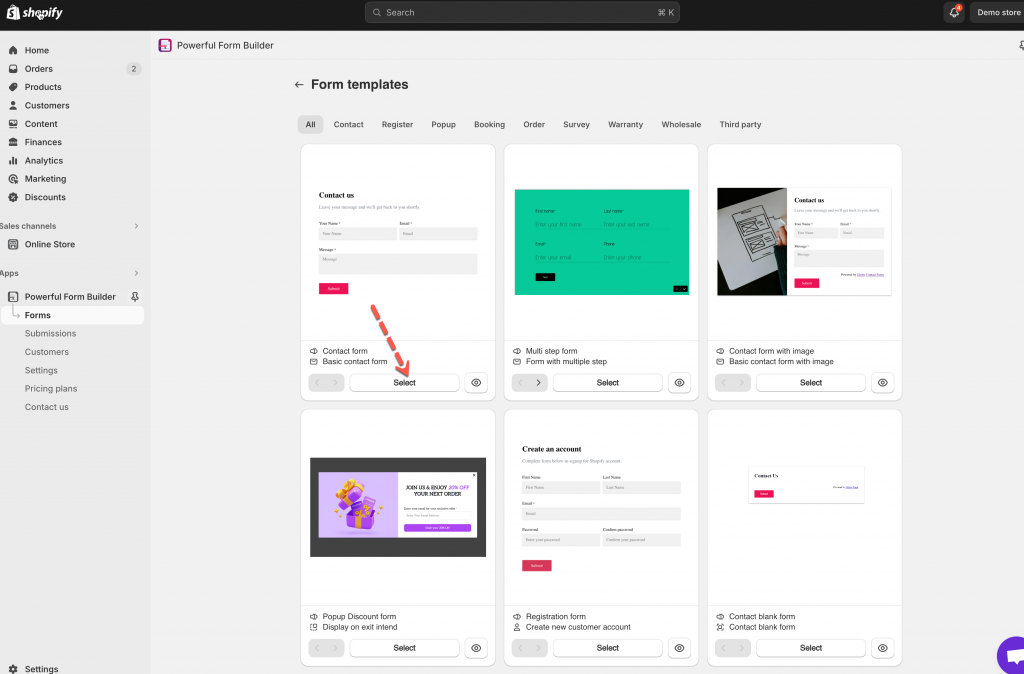
- Select a form template you want
Step 2: Start building a new form.
In this article, I use the Contact pre-built form as illustration.
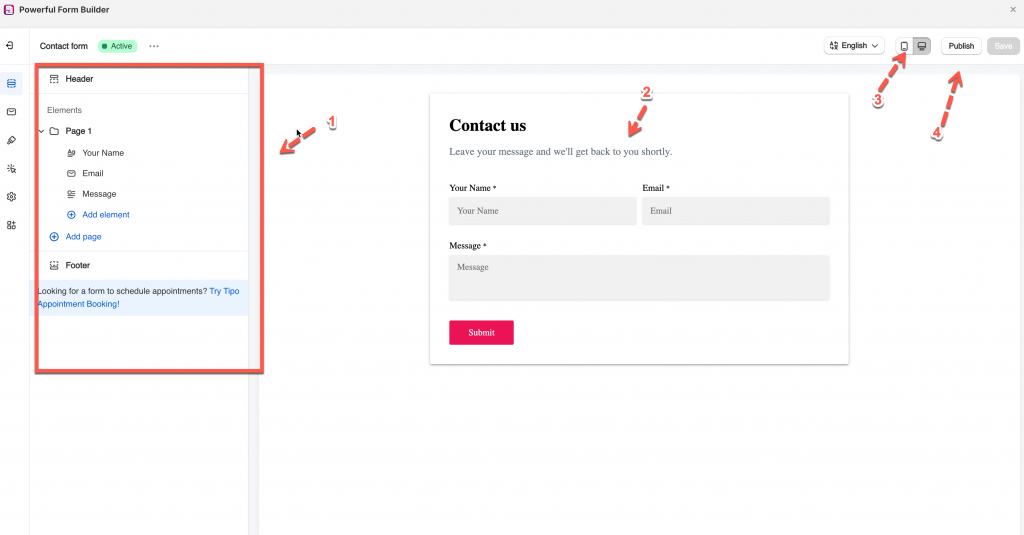
We divide the building form page into several parts:
- List of elements and settings for the current form
- Form preview
- Desktop and mobile preview
- Select page to publish form
Steps to manage
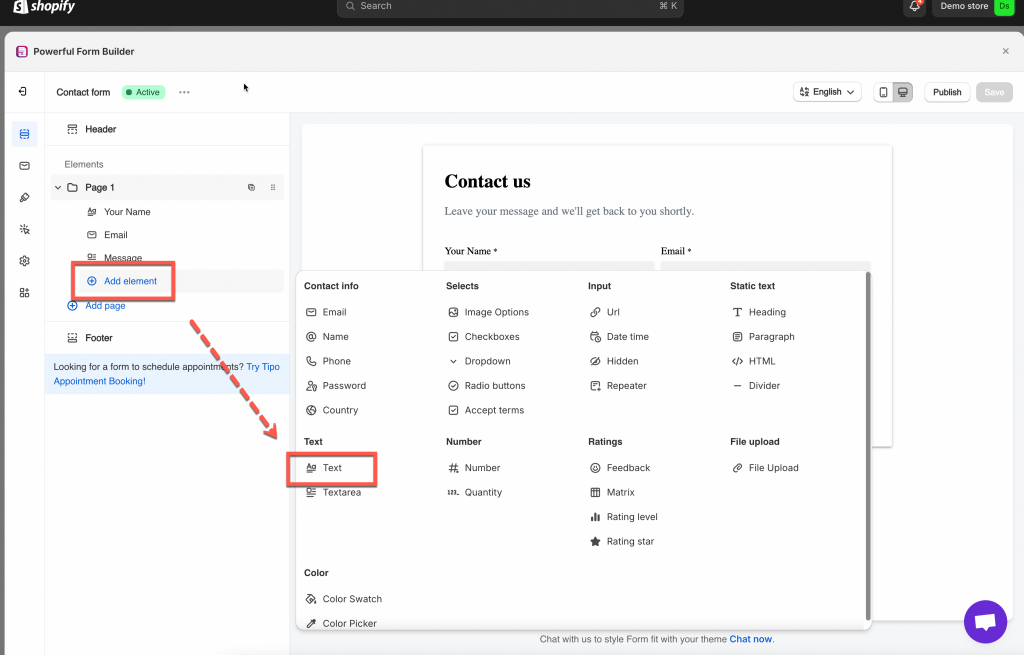
- To add more elements, click on the Add elements button in section 1. The list of available elements will appear.
- Select the element that you want to add to the new form
- Click on the element, available properties setting for the element will be displayed
(Note: Available properties setting will correspond to a type of element)
Some general settings for elements as below:
(1) Hide label: label above the form field will be hidden
If Hide label checkbox is ticked, checkbox Keep position of label show up. Tick on it of you want to leave the space of label on the form.
(2) Required: customers must fill out the field to submit the form
If the setting Required is enable, the checkbox Show required note if hide label? will show up.
(3) Hide label
(4) Column width: select one of 3 option to decide the width of the field on the form
- Finally, remember to click the Save button after you edit the form
Step 3: Display form on front store
After saving the form, display the form on the page you want.
Learn more about displaying your form on the front store
Tutorial video
If you do encounter any difficulty while proceeding these steps, don’t show any hesitation to contact us promptly via the email address [email protected]
We are always willing to help with all sincerity!

