Throughout this guideline, we will give you a closer look at the steps of creating your first subscription plan.
General steps
- From app admin page, click Selling Plans > click Create selling plan button
- In the new subscription plan, configure the detail of 3 main parts: Subscription information, Subscription products, Subscription plans detail
Add Subscription information - Click Save
- Check the app widget on the product page on the front store. Make sure the app block is added to the theme here
Please view below information to know more about the selling plan detail.
Subscription information
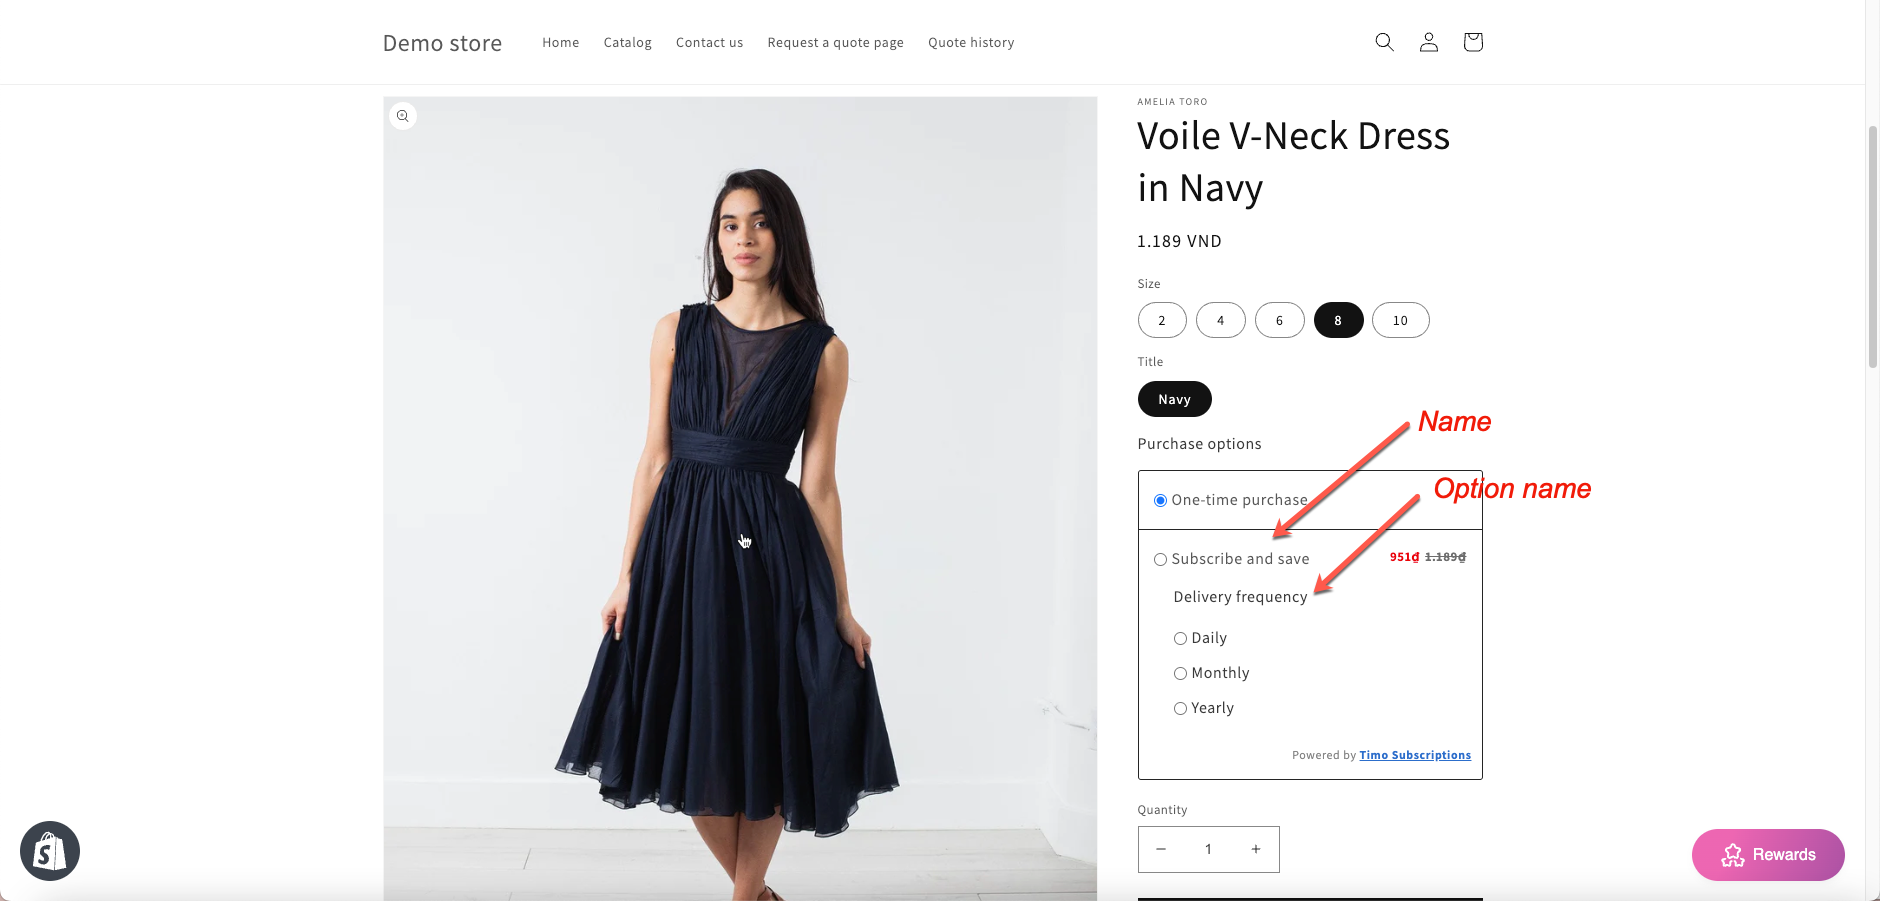
Users can set up the Name of the subscription plan, This name will show up on the front store.
- Name field: provide a name for this subscription plan. For example: Subscribe and save
- Option Name field: enter your option name For example: Delivery frequency
Subscription products
For the selected products, the app widget will show up on the product page.
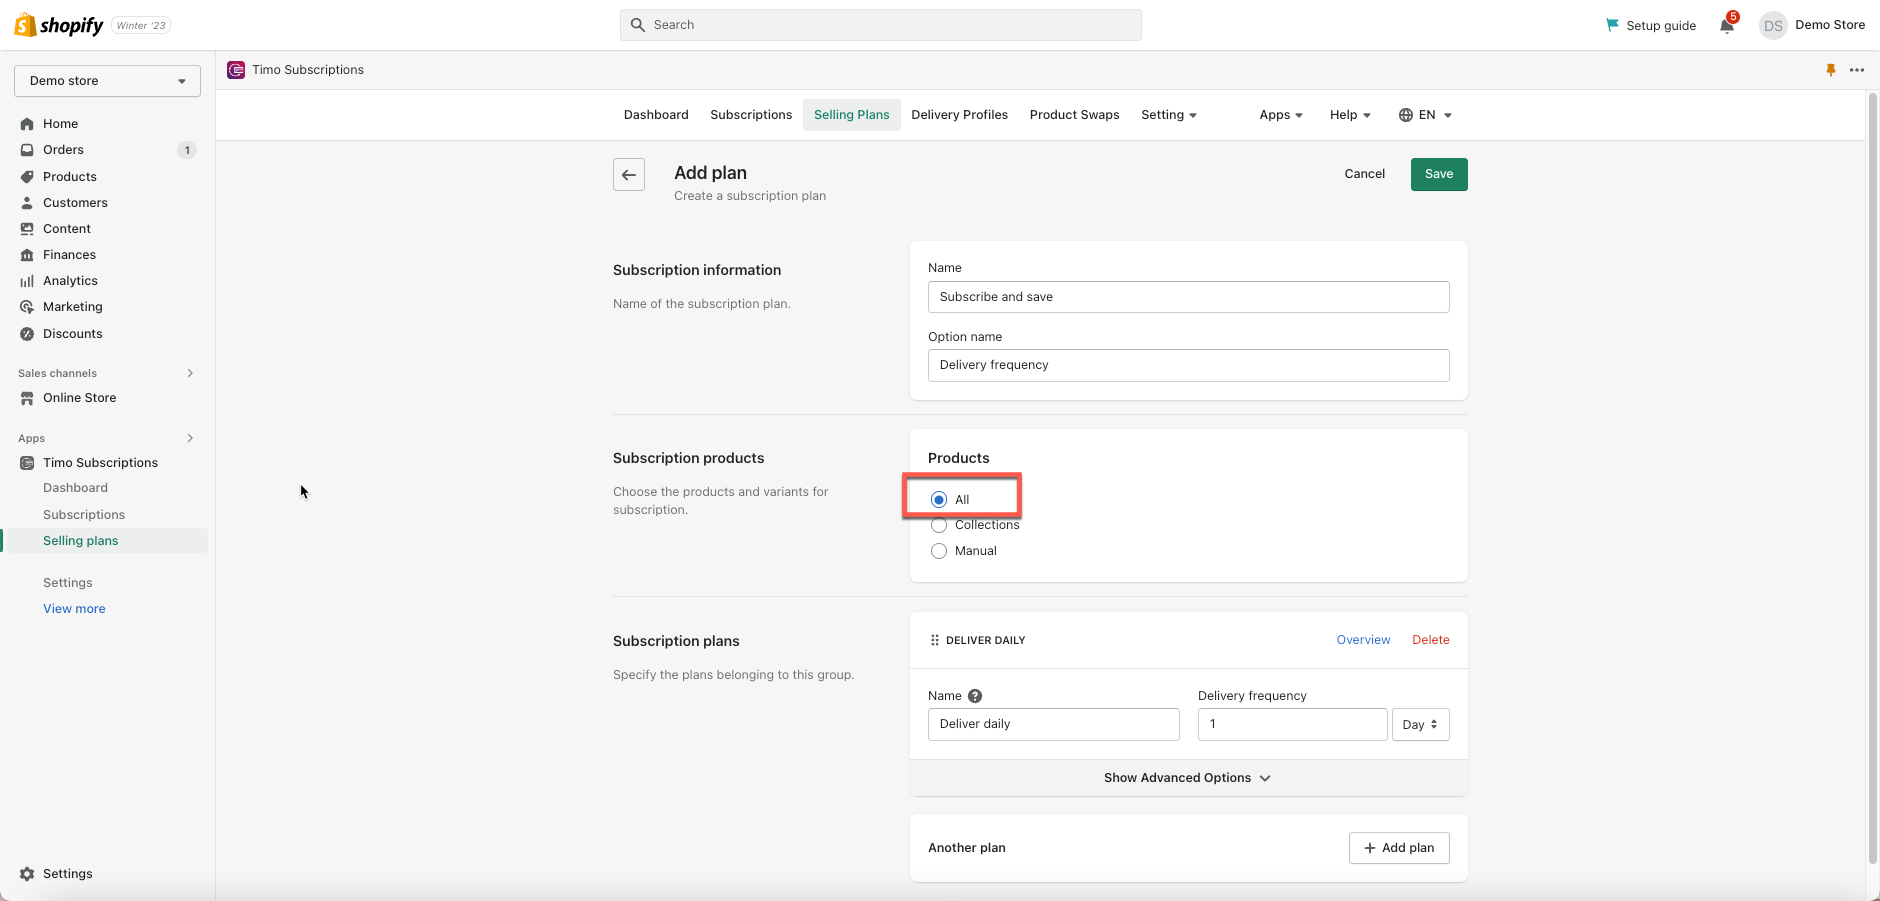
There are 3 options to select products: All/Collection/Manual
- All: The subscription plans will be applied to all products on your store
- Collection: The subscription plans will be applied to products in the selected collection

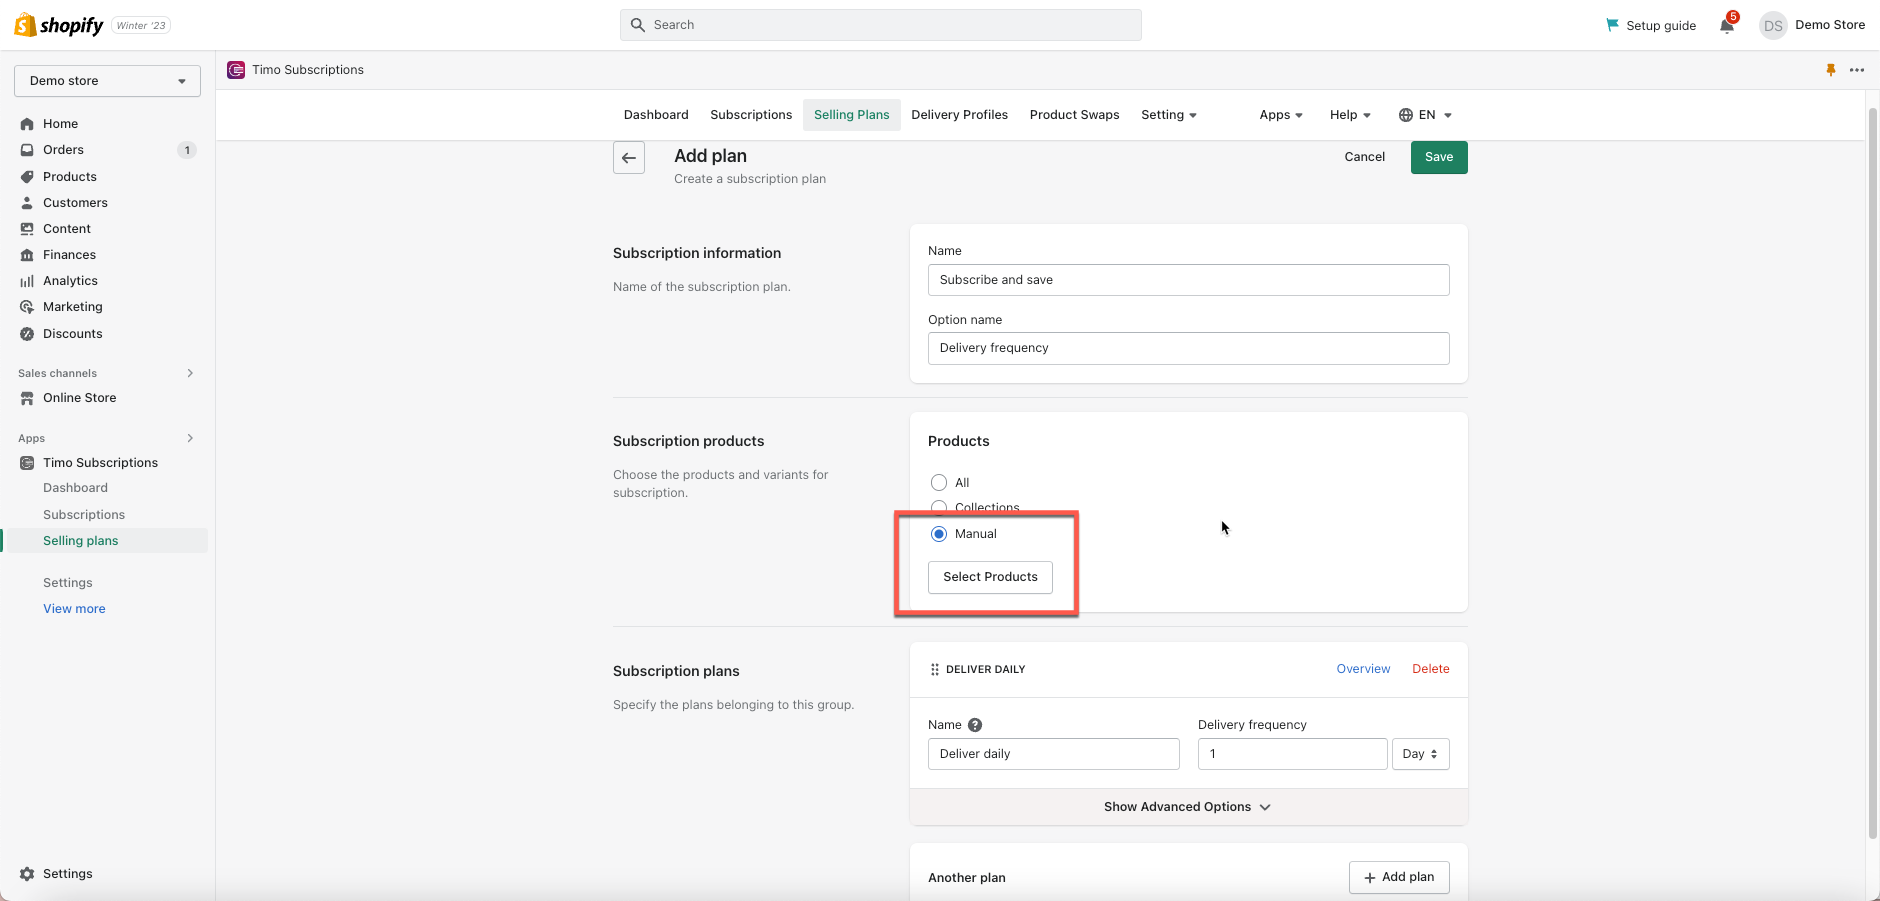
- Manual: You can manually select products to add to this subscription plan by browsing products. To select specific variants of a product, you must click on its product name. The list of variants will appear below the product name.

Subscription plan details
Each subscription plan will be an option on the app widget. You can create multiple plans for your products.
- Name: enter the option name. This name will appear in the cart and at checkout and should include the delivery frequency.
Set up subscription frequency
This app covers almost all types of subscription frequency which include Daily/Weekly/Monthly/Yearly.
You feel free to add any delivery frequency options that are suitable to your business by entering the number and select the time unit (day/week/month/year)
For example:
The product will be delivered everyday based on the setup below

The product will be delivered every week based on the setup below

- Discount: if the plan is selected by customers, they can purchase it with the discount price of (x) percentage/amount. Learn more
- Description: enter the text in the description field to let customers know more about your plans
4. To configure the advanced settings (billing policy, delivery date, and cut-off day) of each subscription frequency, you click Show advanced options
Choose a billing policy
To configure the advanced settings (billing policy, delivery date, and cut-off day) of each subscription frequency, you click Show advanced options
Our app provides 2 billing policy types: Pay per delivery and Prepaid. You should see some below definitions for further clarifications.
- Pay per delivery: The customers must pay for the order when the item ships.
- Prepaid: The customers must pay in advance for their orders.
– Charge customers every X week(s): This is the number of deliveries that the customers must pay in advance for. For example, if you set the delivery frequency as 1 week, and if the billing timeframe is 12 weeks, and if, your customers will be charged for 12 weeks, but receive the deliveries once a week, for 12 weeks.
– Minimum number of billing iterations: This is the minimum number of billing iteration you want to bind your customers with before they can cancel their subscription. The default value is one (the very first billing iteration)
For example: Customers can cancel the plan after 2 times being charged based on the setup below:
– Maximum number of billing iterations: This is the maximum number of billing iteration that will be fulfilled as a part of the subscription plan, after which it will automatically expire. The default value is infinity.
For example: The plan will be automatically canceled after 6 times being charged based on the setup below:
Set delivery date
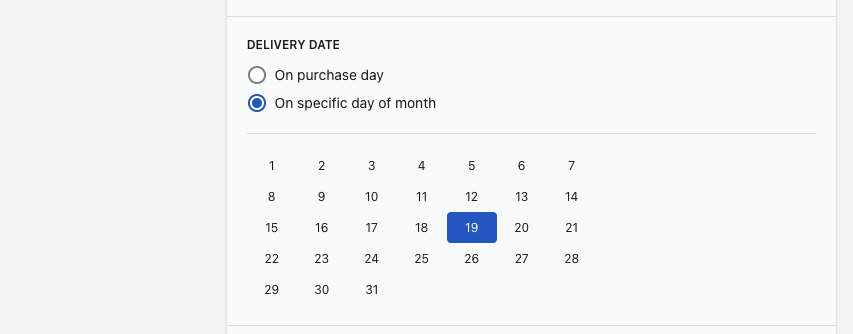
Our app provides 2 types of delivery date options: On purchase date and On a specific day of week/month/year.
- On purchase date: The customers will receive the item on the day they place the order.
- On a specific day of week/month/year: The customers will receive the item on a specific day of the week/month/year.
– If the delivery frequency is “weekly”, you must choose a specific day of the week from the day dropdown to ship your item.
– If the delivery frequency is “monthly” or “yearly”, you must choose a specific date from the calendar to ship your item.
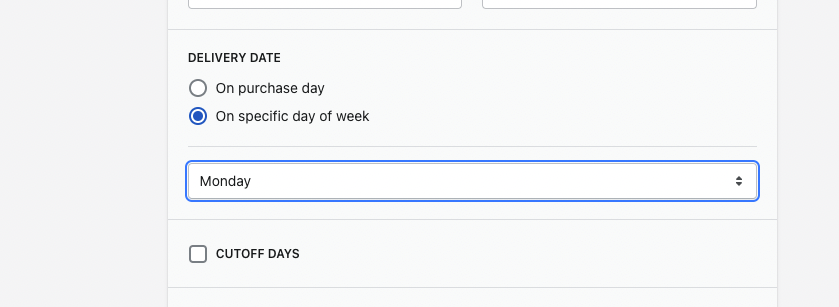
Set cut off days
Ticket on the checkbox CUTOFF DAYS and enter the days you want.

The number of cutoff days indicates how many days in advance the order would need to be placed in order to qualify for the upcoming order cycle.
Let take the below example for a better understanding of this functionality:
- The subscription’s billing date is on the 10th of every month.
- The cut-off is 5 days.
–> All orders which are being placed during the time from 5th to 10th will not be charged again on 10th this month and will move to the next month’s billing cycle instead.
A question might arise: What happens if we don’t set cut-off days in this case?
If your customer places an order on the 13th (they had to pay you immediately when placing this order), without cut-off days, the next billing will occur on the 15th – only after 2 days of the first charge!! You even don’t have time to send the first item to your customers in this case.
In general, the cutoff days functionality helps to prevent this kind of too-close payment between the subscription’s initial and 2nd payment of the billing cycle.
Manage discounts after a number of billing cycles
This app allows you to set discounts for each subscription plan. You are able to set a fixed discount value in Percentage or Amount value.
Steps to manage
- From the app’s left navigation bar, click Selling plans.
- Choose a subscription plan you want to offer discounts on.
- To configure the advanced settings (billing policy, delivery date, and cut-off day) of each subscription frequency, you click Show advanced options
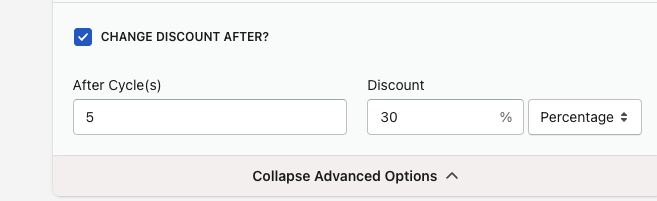
- Tick on the checkbox CHANGE DISCOUNT AFTER?
- Enter the number of cycles and the discount value with fixed amount or percentage
- Click Save to finish.
For example:
The subscription discount will be changed to 30% of product price after being recurring 5 times.
If you have any questions or concerns, don’t hesitate to contact us at [email protected]. We are always willing to help with all sincerity.