Settings in app
Steps to manage
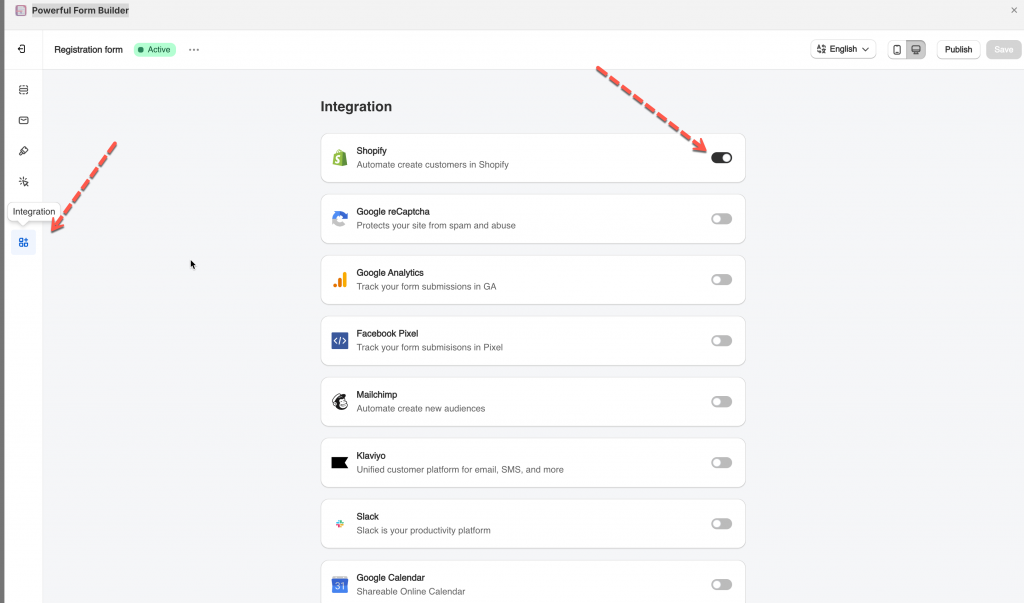
1. Open the app > click Forms > open the form you want to edit
2. Click the Integration icon on the left side > enable Shopify
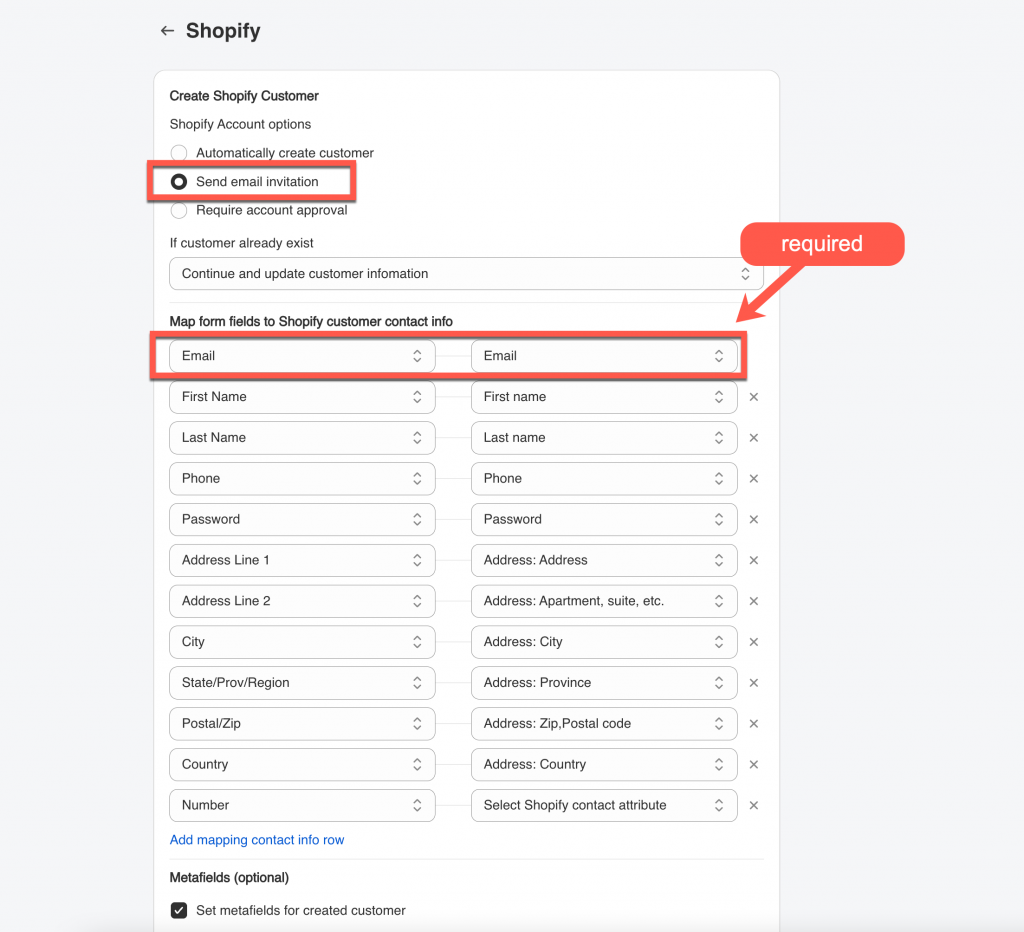
3. Select Shopify Account options > select Send email invitation
4. Select the shopify attributes (on the right) to map with form fields (on the left). For example the Last name field of the form should be mapped with Shopify last name attribute,
Email field on the form is required to be mapped with email attribute of Shopify.
5. Add customer tag, note, metafield and select Marketing status of customer account (optional)
6. Save the form to apply the change
Submit the form and check the result
Require email verification workflow
The app will create a customer profile in Shopify when a new customer submits the form, but these new customers will not be able to access their account until they verify their email address.
1. Customer form submission
The customer fills out and submits your form on the storefront.
2. Account activation invite
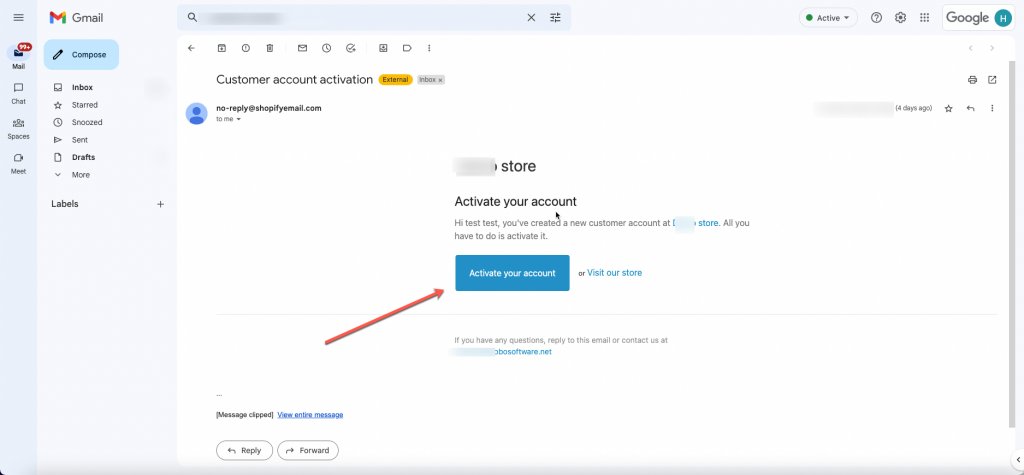
- After form submission, an account activation email will be sent to the customer.
- By default, the body of Shopify’s invite email includes a link/button that allows the customer to confirm their email address and activate their account.
3. Customer activates account
When the customer clicks the link/button in the email, they’ll be redirected to the store’s native account activation page to set a password and activate their new account.
If you do encounter any difficulty while proceeding these steps, don’t show any hesitation to contact us promptly via the email address [email protected]
We are always willing to help with all sincerity!


